Have you heard of Canva? It’s a graphic design platform lets you create everything from Instagram posts to business logos, for absolutely no cost. Using it is simple and painless thanks to all the preloaded templates, images, fonts, and graphics, and it offers a very well-designed, intuitive, user interface. All you need to use it is to sign up with Google, Facebook, or an email address.
We’re taking an overview-style look at All Of The Things you can do for free on the Canva website.
A brief history of Canva
Image: canva / amy-mae turner
Canva was founded in Sydney, Australia, in July 2012 by tech entrepreneurs Melanie Perkins, Cliff Obrecht, and Cameron Adams.
The Canva concept came from Perkins, who realized there was a gap in the market for an easy-to-use graphic design platform. As a commerce and communications student at the University of Western Australia, Perkins was frustrated by how complicated and hard to learn mainstream design software was. Canva’s aim? To enable the whole world to design.
Within a year of its launch, Canva had racked up three-quarters of a million users. As of 2020, Canva had more than 30 million monthly active users.
Canva is also available as iOS and Android apps, but for the purpose of this feature we’re looking at the full-fat website version.
What does Canva offer for free?
Image: CANVA / AMY-MAE TURNER
The answer is quite a lot. The “free forever” features include more than 250,000 templates, over 100 design types (social media posts, presentations, letters, and more), and hundreds of thousands of photos, font styles, and graphics.
All users with free accounts can also enjoy 5GB of cloud storage and the ability to invite friends to your Canva “team” to collaborate and comment on designs in real-time. Each free team can have up to 3,000 members, and you can create up to 20 free teams.
Once you’ve made a Canva creation, the platform makes it very simple to download it to your computer, share it with others, and, in some cases, post it directly to other websites.
What are the paid-for Canva options?
Image: CANVA / AMY-MAE TURNER
Obviously, paying to use Canva Pro will get you even more functionality. All the design content on the platform will be unlocked for you to use as often as you like, which means you’ll have unlimited access to over 420,000 templates with new designs added daily. You can also enjoy working with more than 75 million premium stock photos, videos, audio, and graphics.
In addition, your cloud storage allowance will get upgraded to 100GB; you can save designs as templates for anyone in your Canva team to use; and you can schedule social media content to publish at certain times and dates.
Going “Pro” allows you to create a “Brand Kit” to upload your own fonts, brand color palette, and logos to use across the entire Canva platform. You’ll also get access to Canva’s impressive “Magic Resize” tool, which, with a couple of clicks, allows you to change a post you’ve created for Twitter, for example, to a perfectly sized Facebook post.
Canva is currently running a limited-time offer offering a 5-for-1 deal on Canva Pro. If you purchase one seat, they’ll include an additional four free seats. This offer ends on Feb. 12. After that, the pricing is as follows:
Australia
Monthly: US$17.99 + US$9.99 for each additional seat
Annually: US$164.99 + US$6.99/mo billed annually for each additional seat
United States
Monthly: US$12.99 + US$6.99/mo for each additional seat
Annually: US$119.99/year + US$4.99/mo billed annually for each additional seat
United Kingdom
Monthly: US$10.99/mo + US$5.99 for each additional seat
Annually: US$99.99/year + US$4.99/mo billed annually for each additional seat
Europe
Monthly: US$11.99/mo + US$6.99/ for each additional seat
Annually: US$109.99/year + US$4.99/mo billed annually for each additional seat
How to use Canva for social media posts
Image: CANVA / AMY-MAE TURNER
With the free version of Canva, you can create a plethora of posts for many social media platforms, meaning you can make professional-looking content even if what you’re selling is just your personal brand.
That includes Instagram posts, stories, and story highlight covers, Facebook posts and covers, YouTube channel art, intros, and thumbnails, LinkedIn banners and posts, Twitter posts, TikTok backgrounds, Pinterest pins, and more.
Canva’s design process is the same across the type of content you create, so if you can make a basic social media post, you’ll be able to go on to create more advanced designs, such as presentations, brochures, or business cards.
Canva’s interface treats each part of your creation as a separate element: The image is one element, colors are other elements, text is another element, and graphics are another. This means creating with Canva is broken down into easy chunks you can tackle one at a time.
We’re going to take you through how to create a basic social media post using a simple Canva template so you can see all these elements edited and changed from the template to the finished product.
Once you’ve signed up for a Canva account, you’re ready to start designing. From the home page, hover over the “Templates” menu and a window will pop up with popular options.
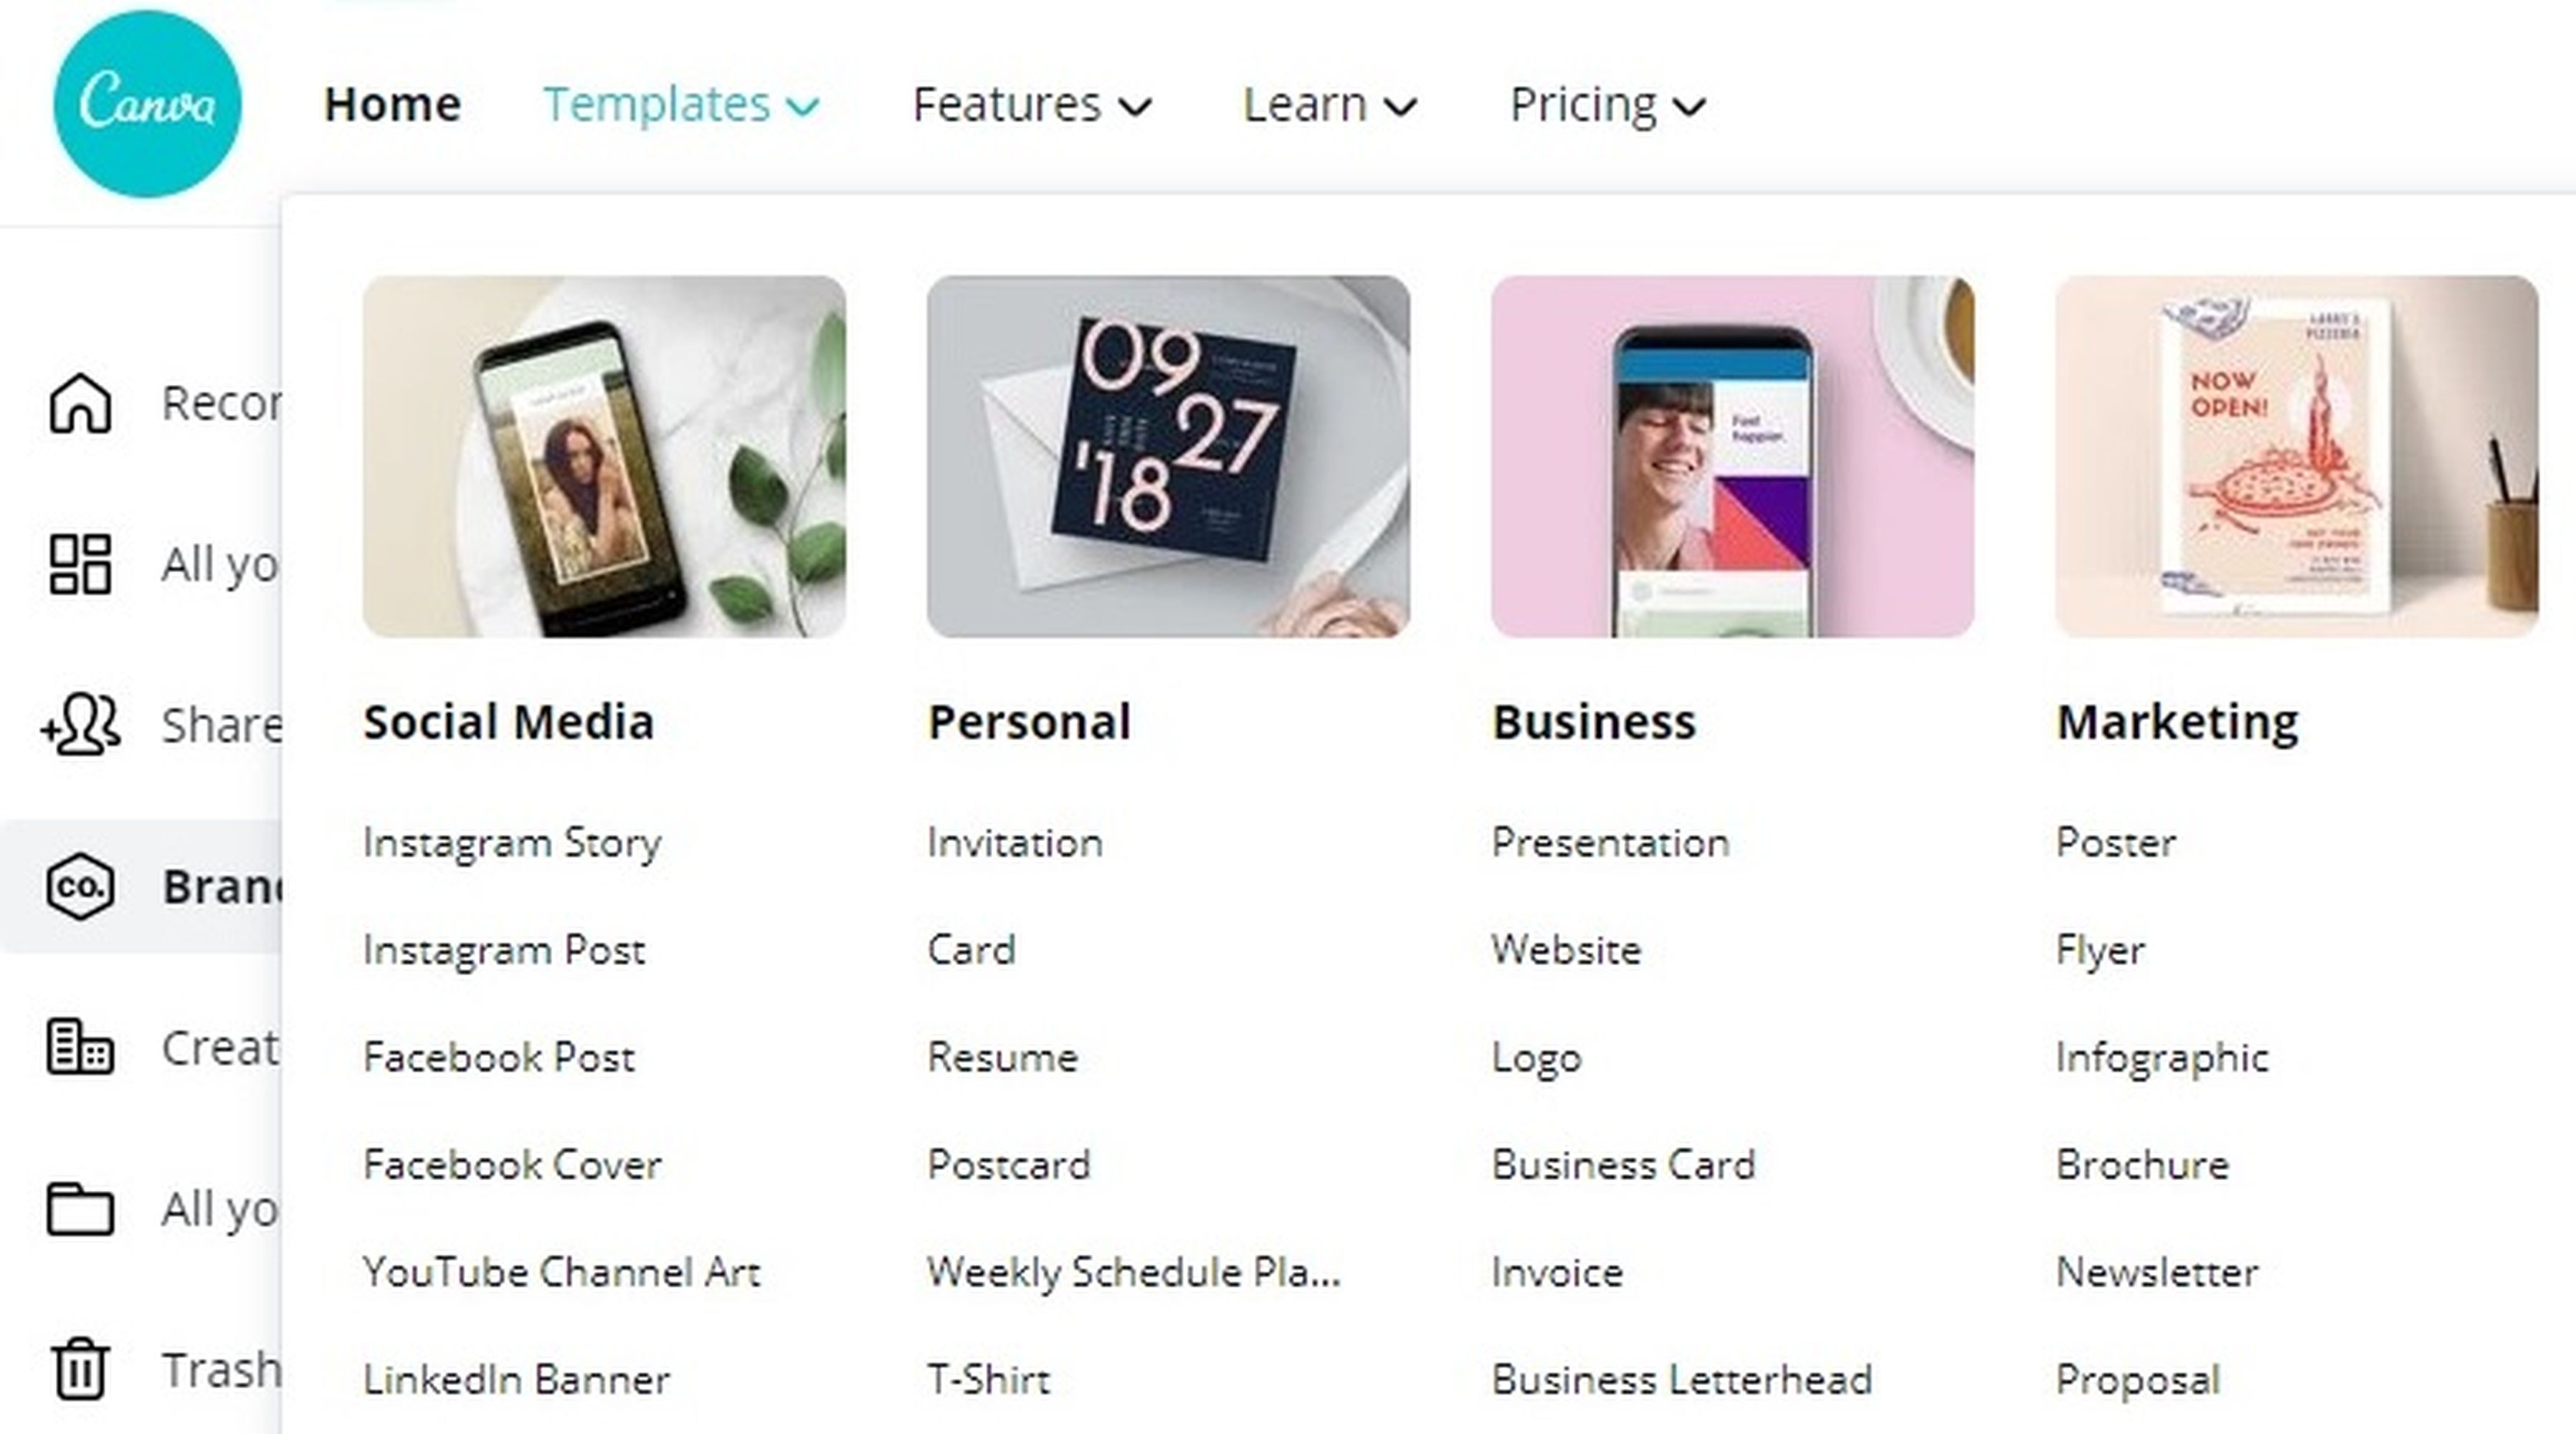
Image: CANVA / AMY-MAE TURNER
We’re creating a standard Instagram post, so that’s what we click on to see the templates available to us. Along the top of the screen, you will see trending search terms, in this instance coronavirus, food, sale, birthday, and summer. There is also a color menu you can click on to narrow down the search results to search your preferred palette.
In addition, there is the choice to create your own Instagram post from scratch using a blank template, but we’re going to use one of the pre-made templates. To open a template for editing, simply click on it and then click “Use this template.”
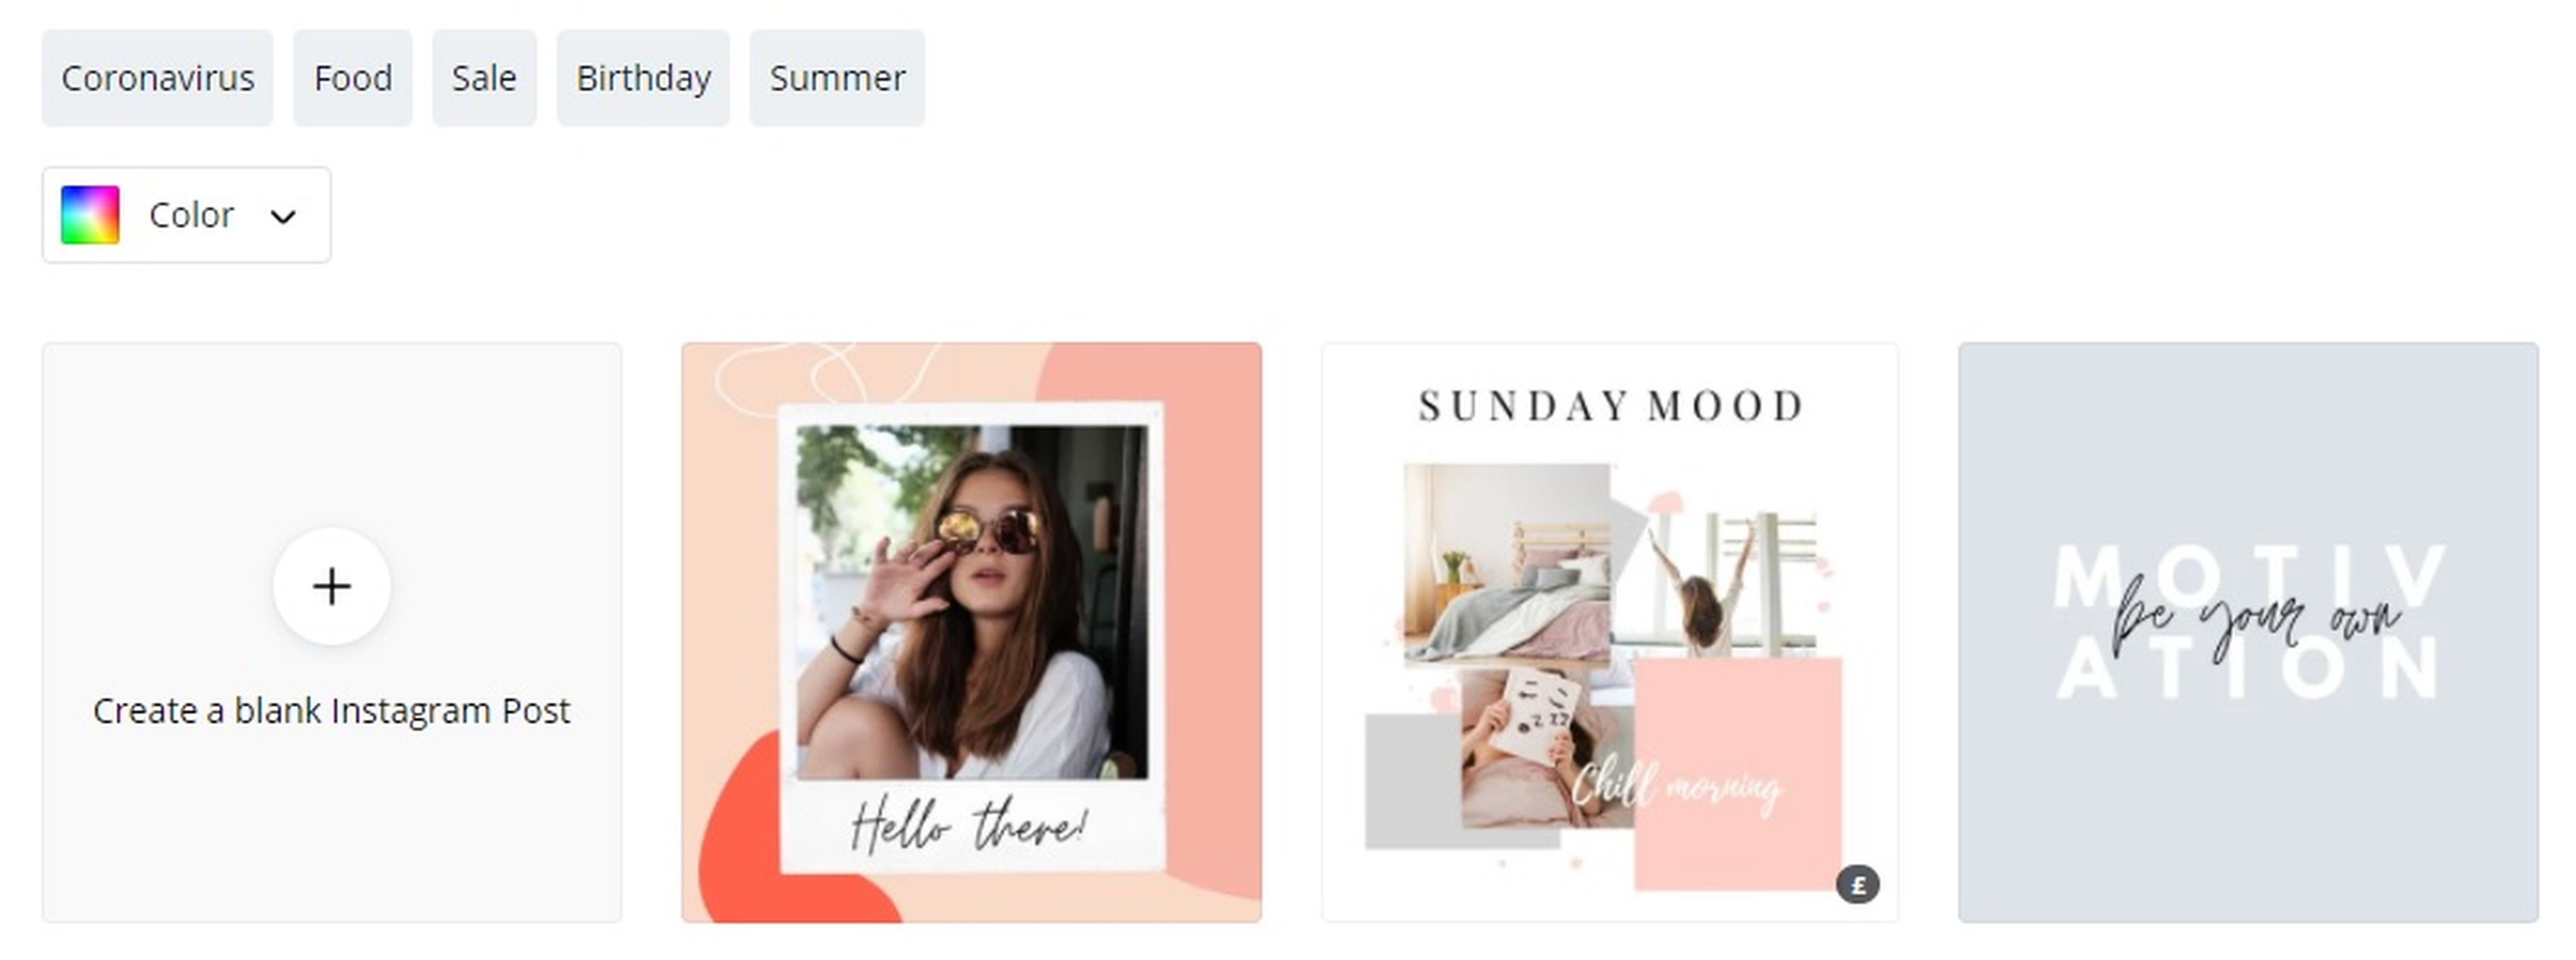
Image: CANVA / AMY-MAE TURNER
This opens the template in a new editing window, which has your design on the right of the screen, your editing options in a bar on the left of your screen, and your download and share options to the top right.
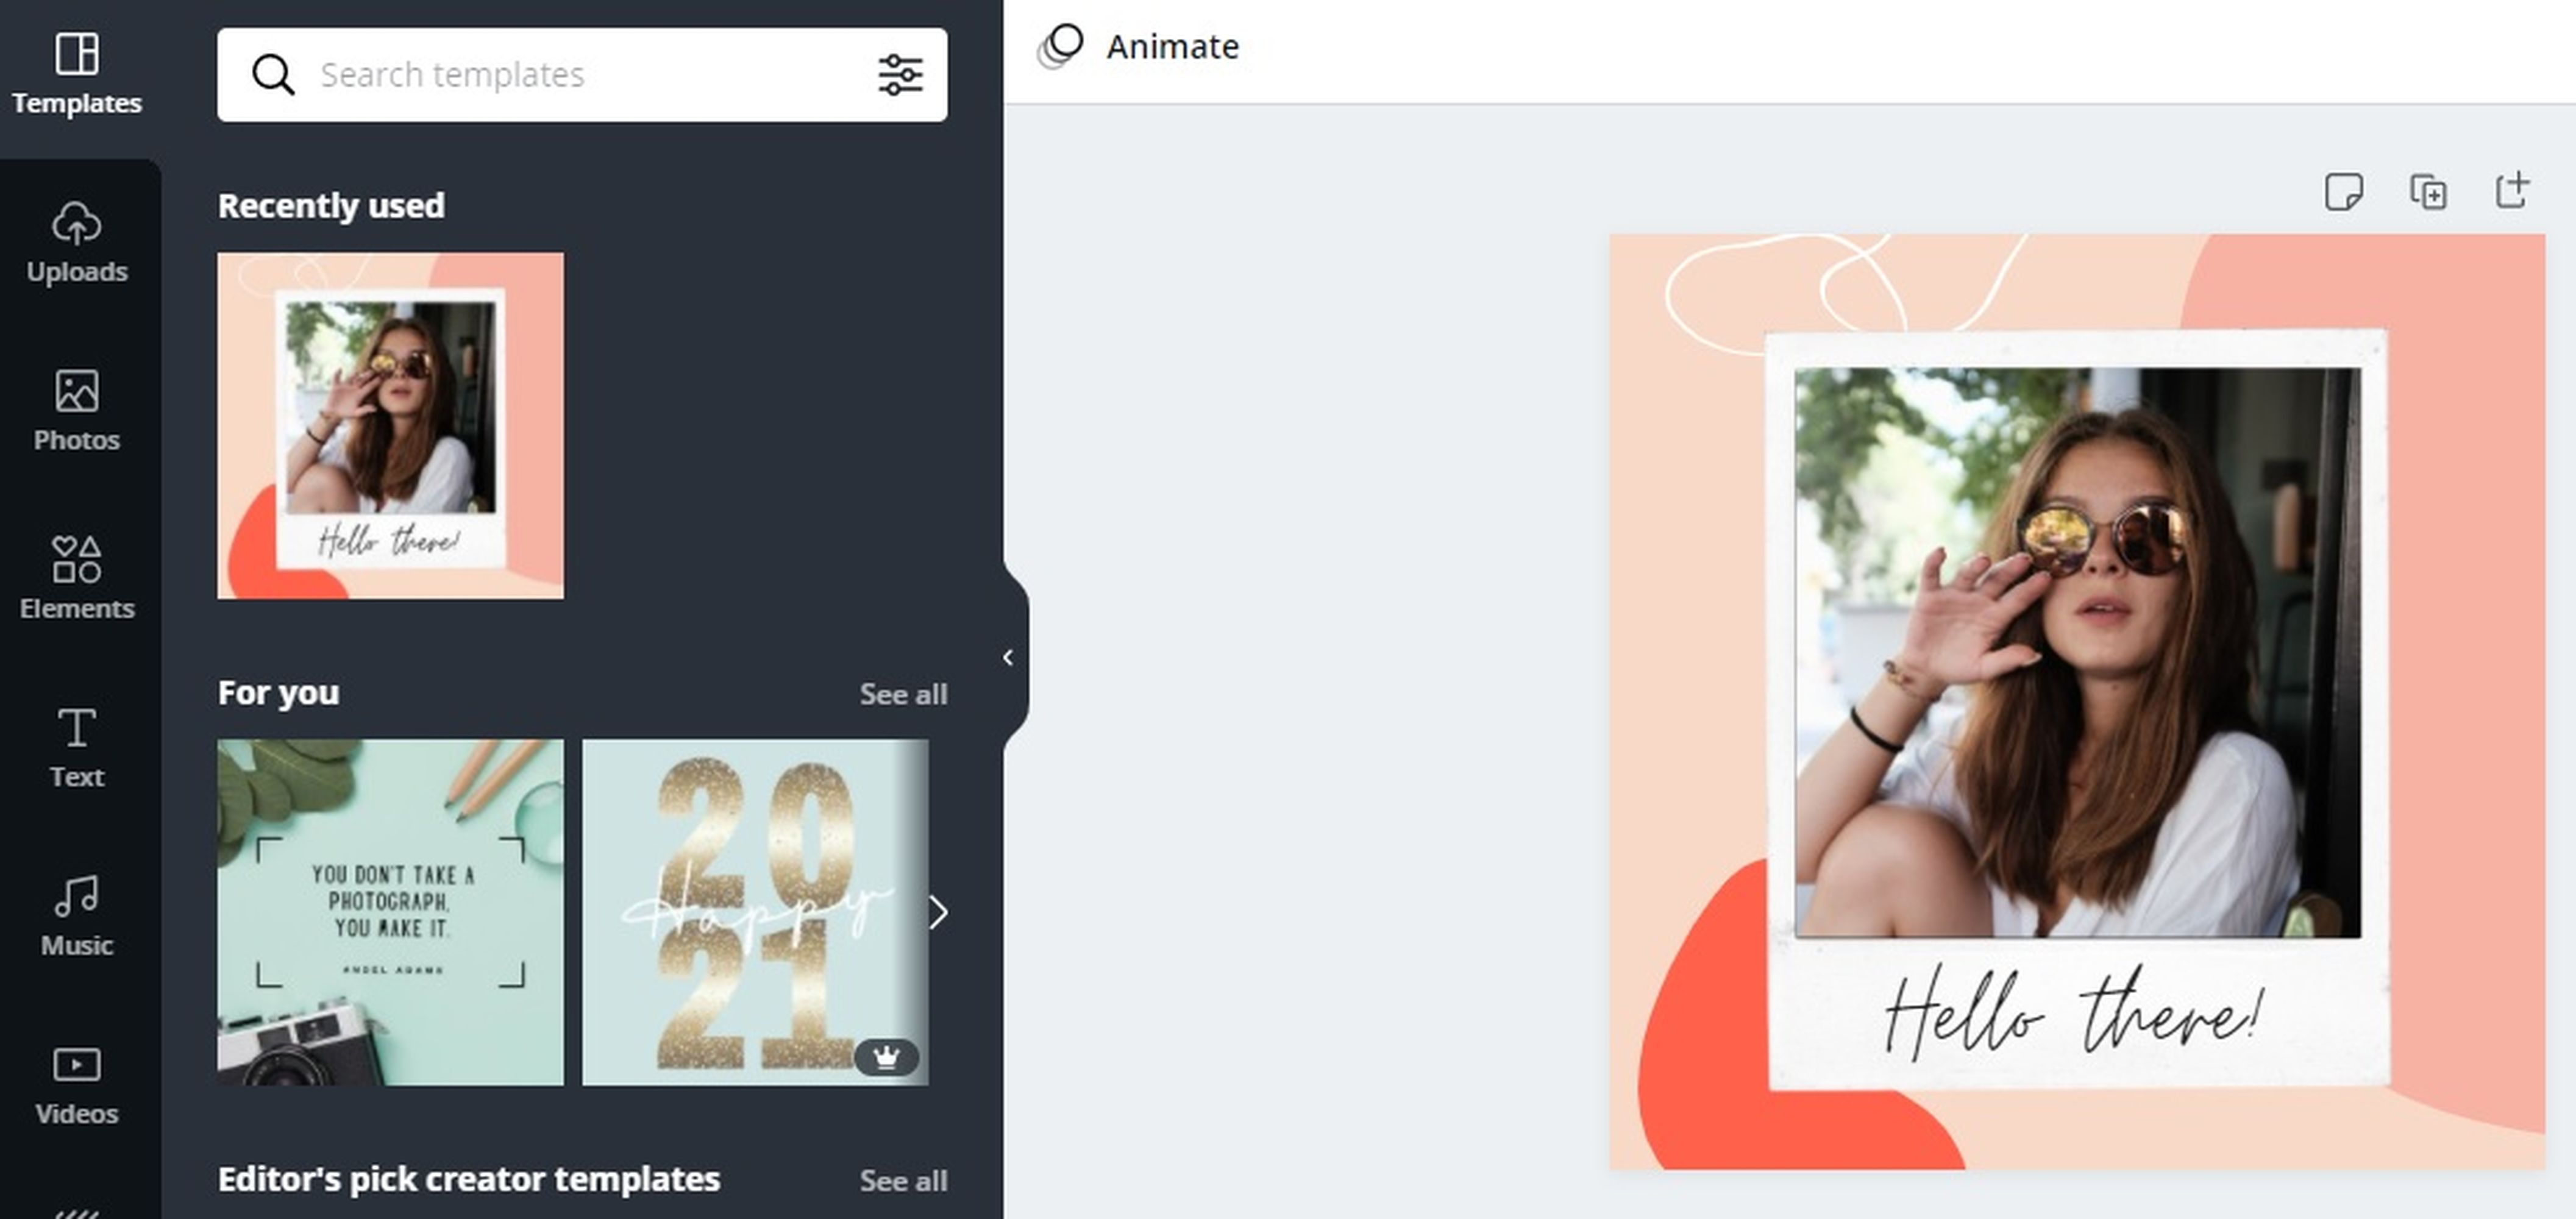
Image: CANVA / AMY-MAE TURNER
As we’ve already explained, Canva’s design process breaks things down into elements. To change the image element, you can click on the template’s image and hit the delete key. Now, if you click on the Photos menu on the left, you can see the photography available to you within Canva.
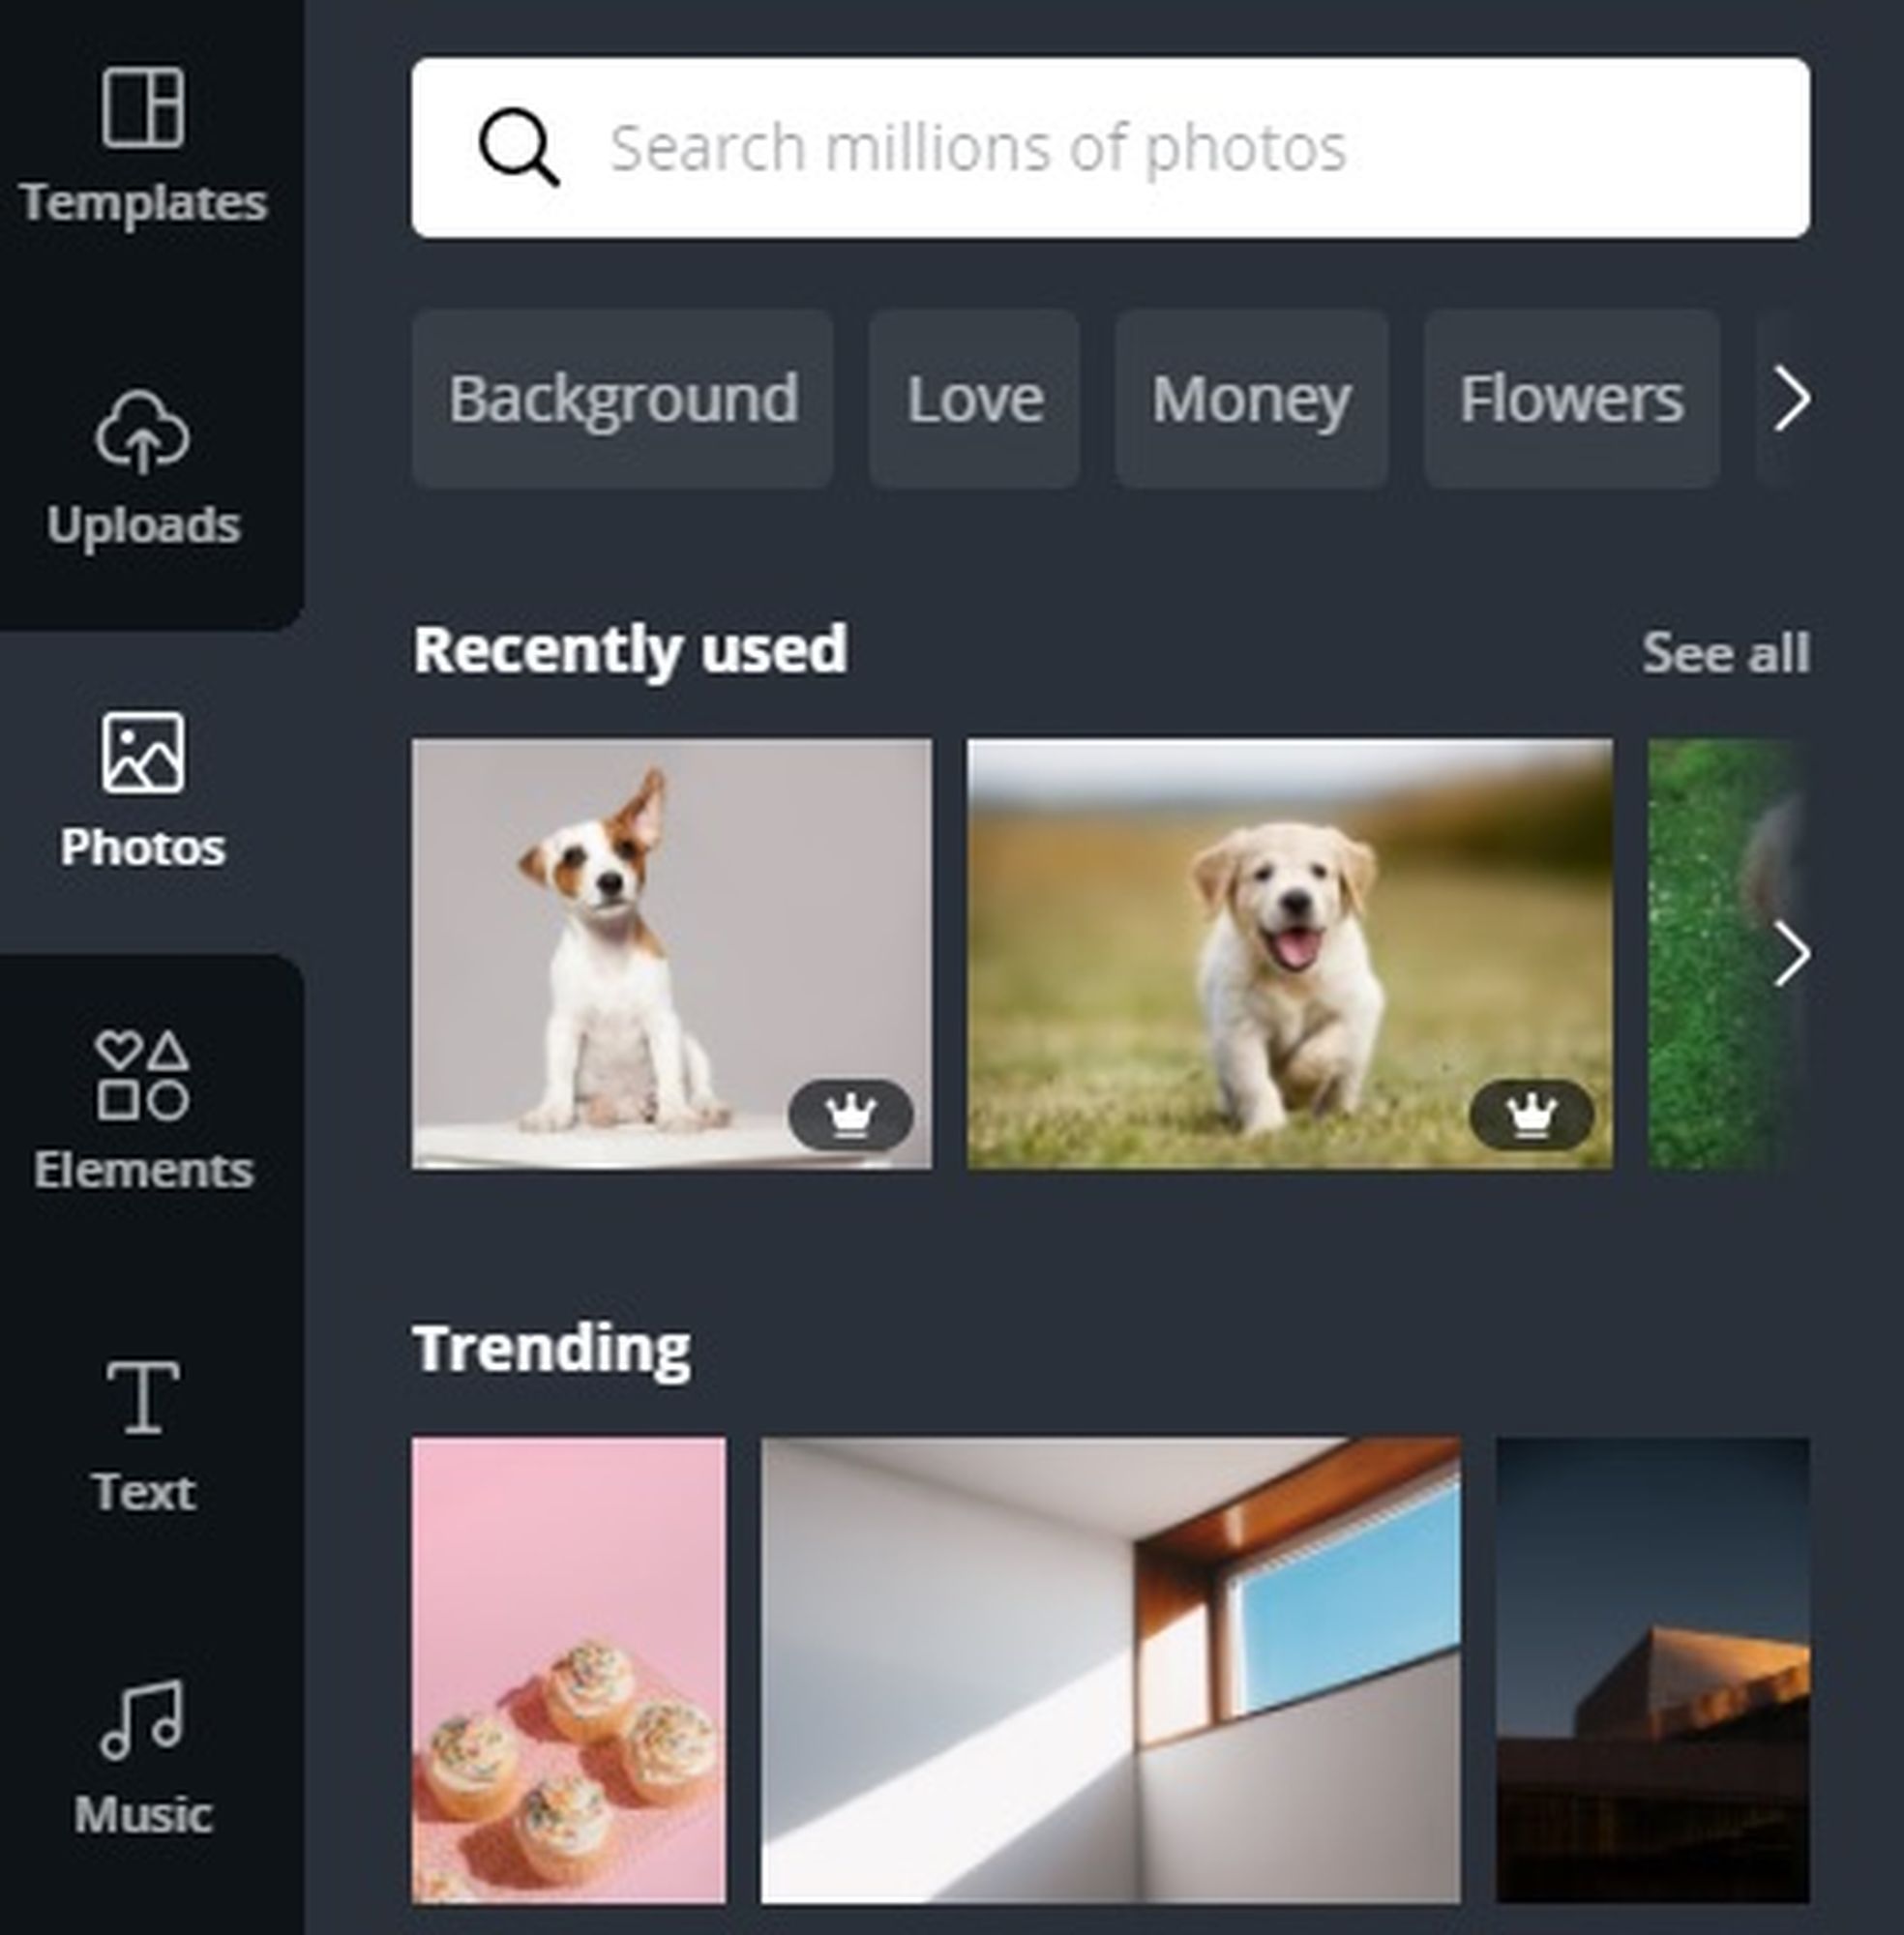
Image: CANVA / AMY-MAE TURNER
You can do a keyword search to find a suitable image, select from your “Recently used” photos, or scroll through the trending images for inspiration. If you want to use any images you see, simply click on them. There are a generous amount of free options, as well as others only available to Canva Pro users. (You can select Pro photos to use in your design, but they will have a Canva watermark on them.) Alternatively, you can upload your own images from your computer. To do this, click on the Uploads menu on the left.
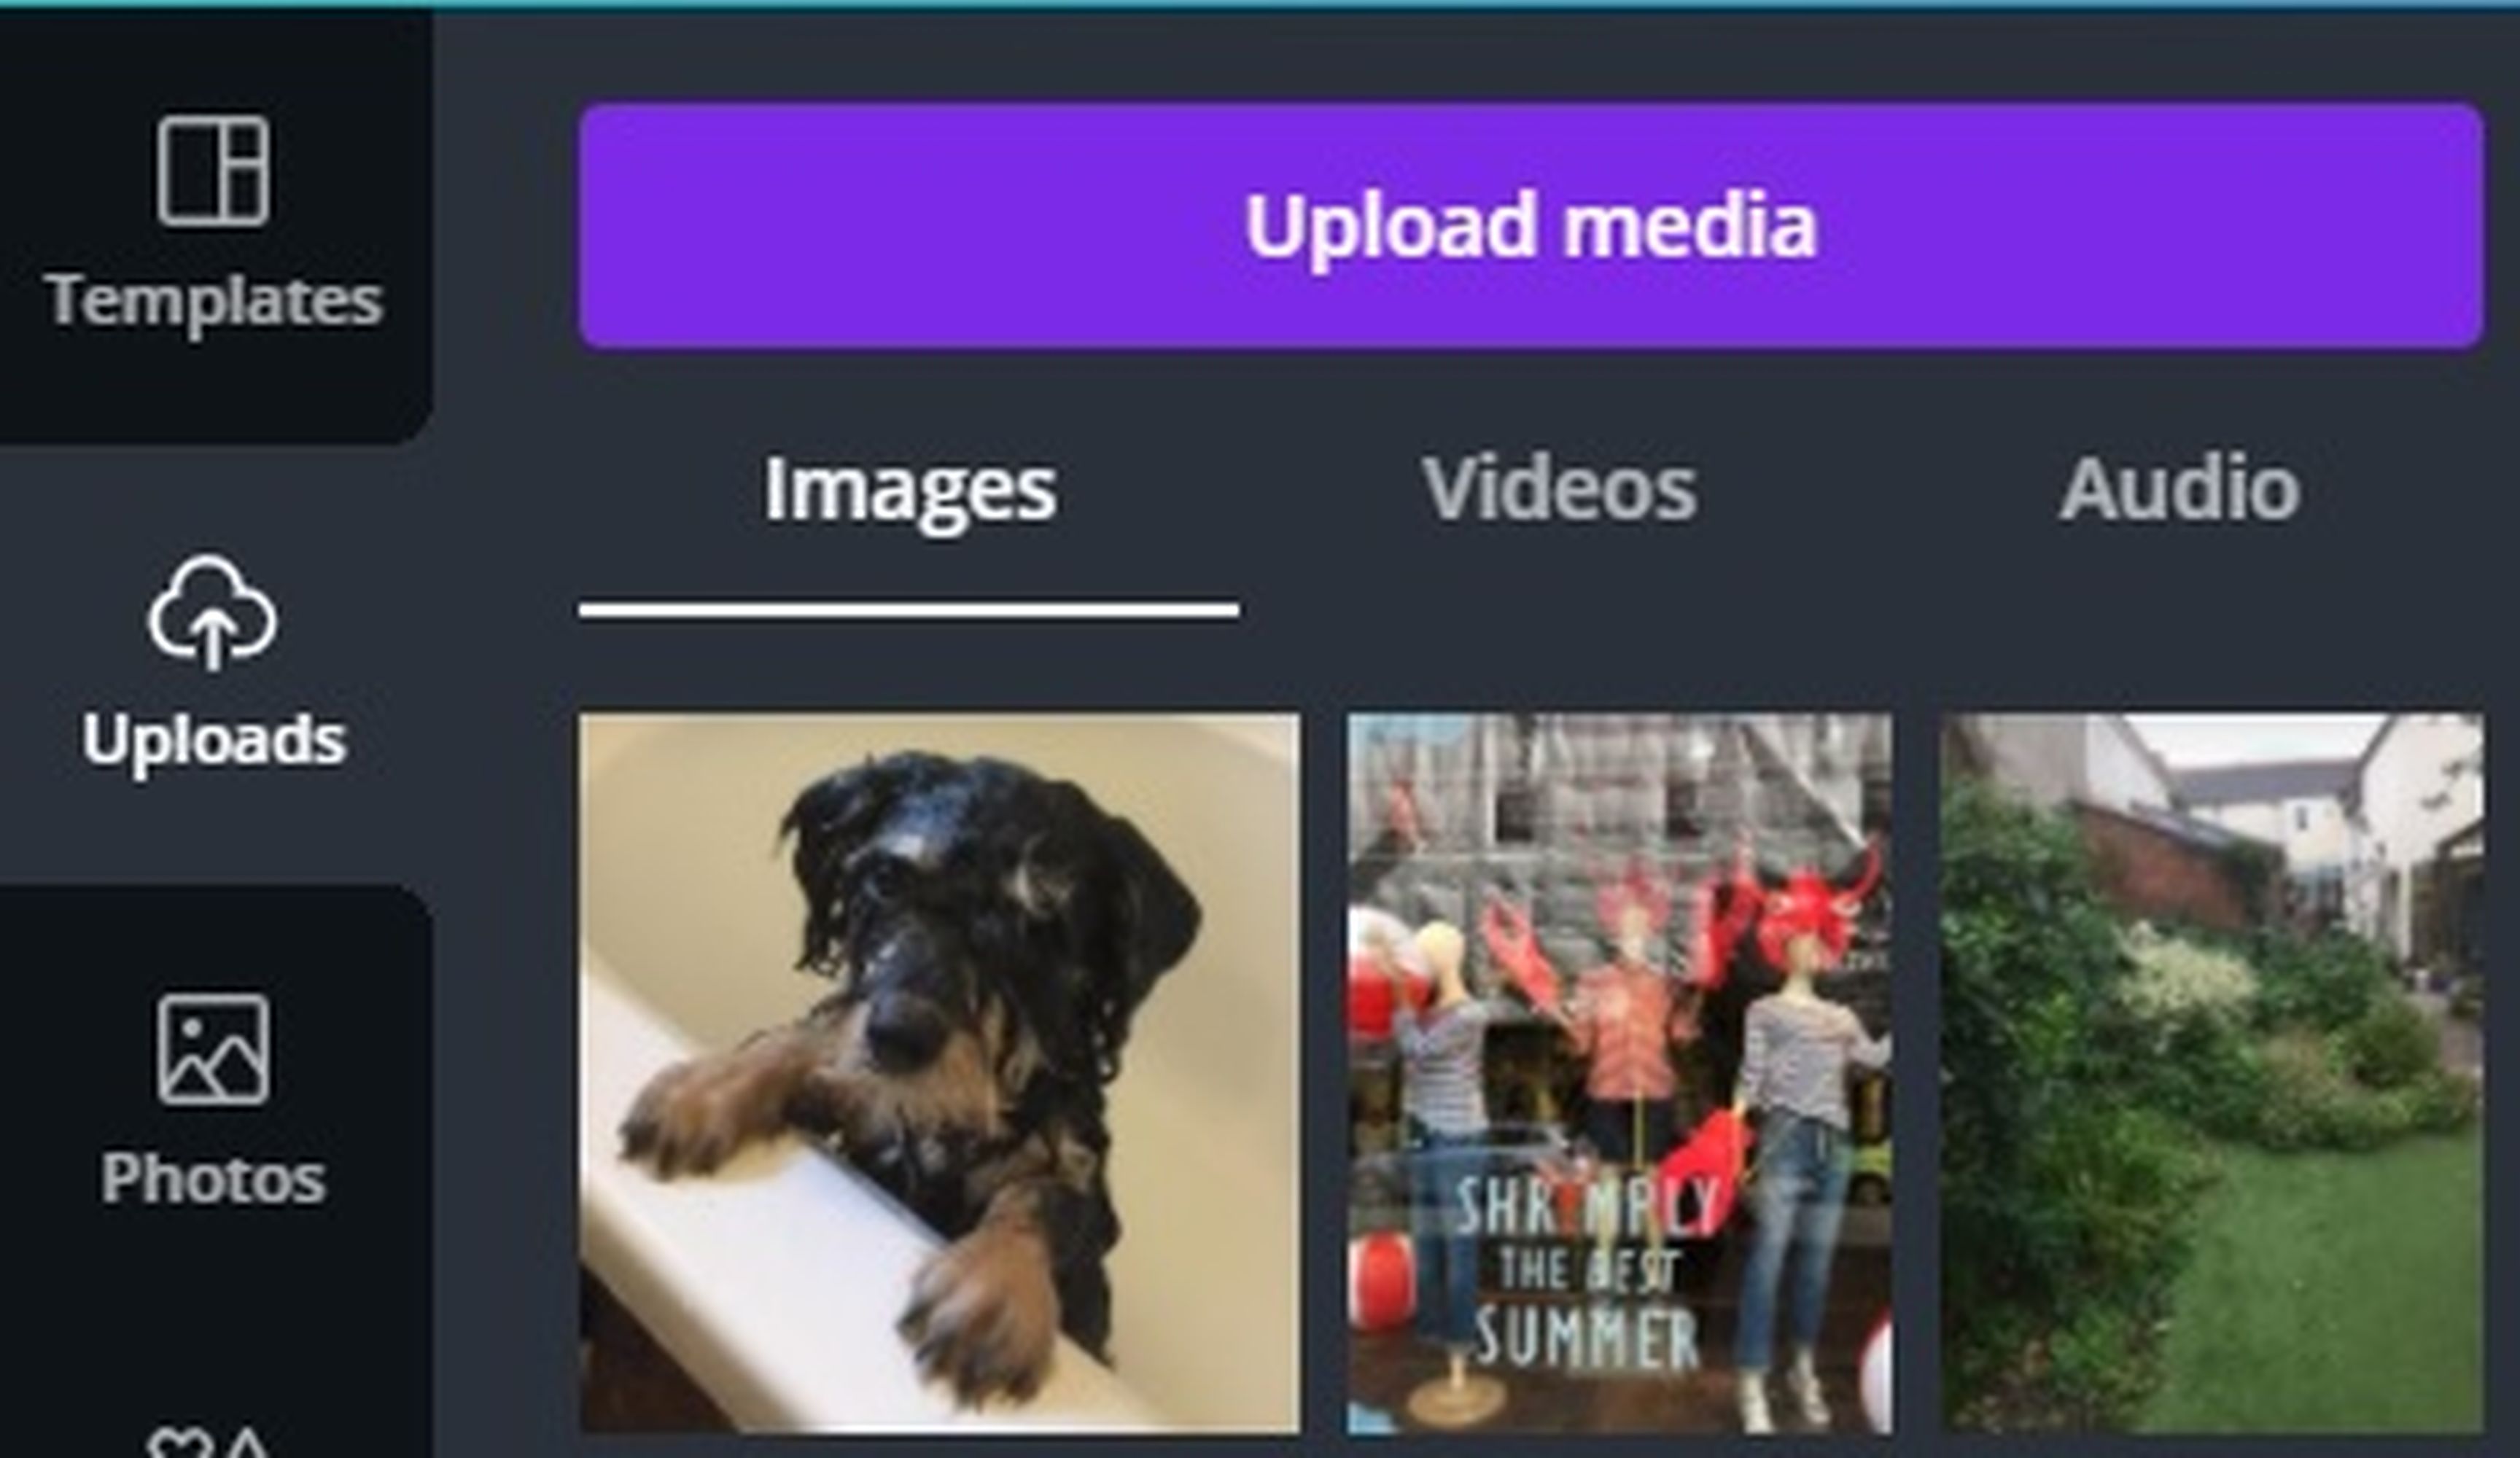
Image: CANVA / AMY-MAE TURNER
This will show you any images you have already uploaded, and give you a big blue “Upload media” button that lets you upload new images from the device you’re using, as well as from Facebook, Google Drive, Instagram, and Dropbox. Once uploaded, select the image you want to use from your Uploads area.
Now we want to change the templated text. To change the text element, simply click on it to highlight it.

Image: CANVA / AMY-MAE TURNER
Then you can overtype the pre-loaded text with your own choice of wording. Once you’ve clicked the text element, you’ll also see all your text editing options appear along the top of your screen.
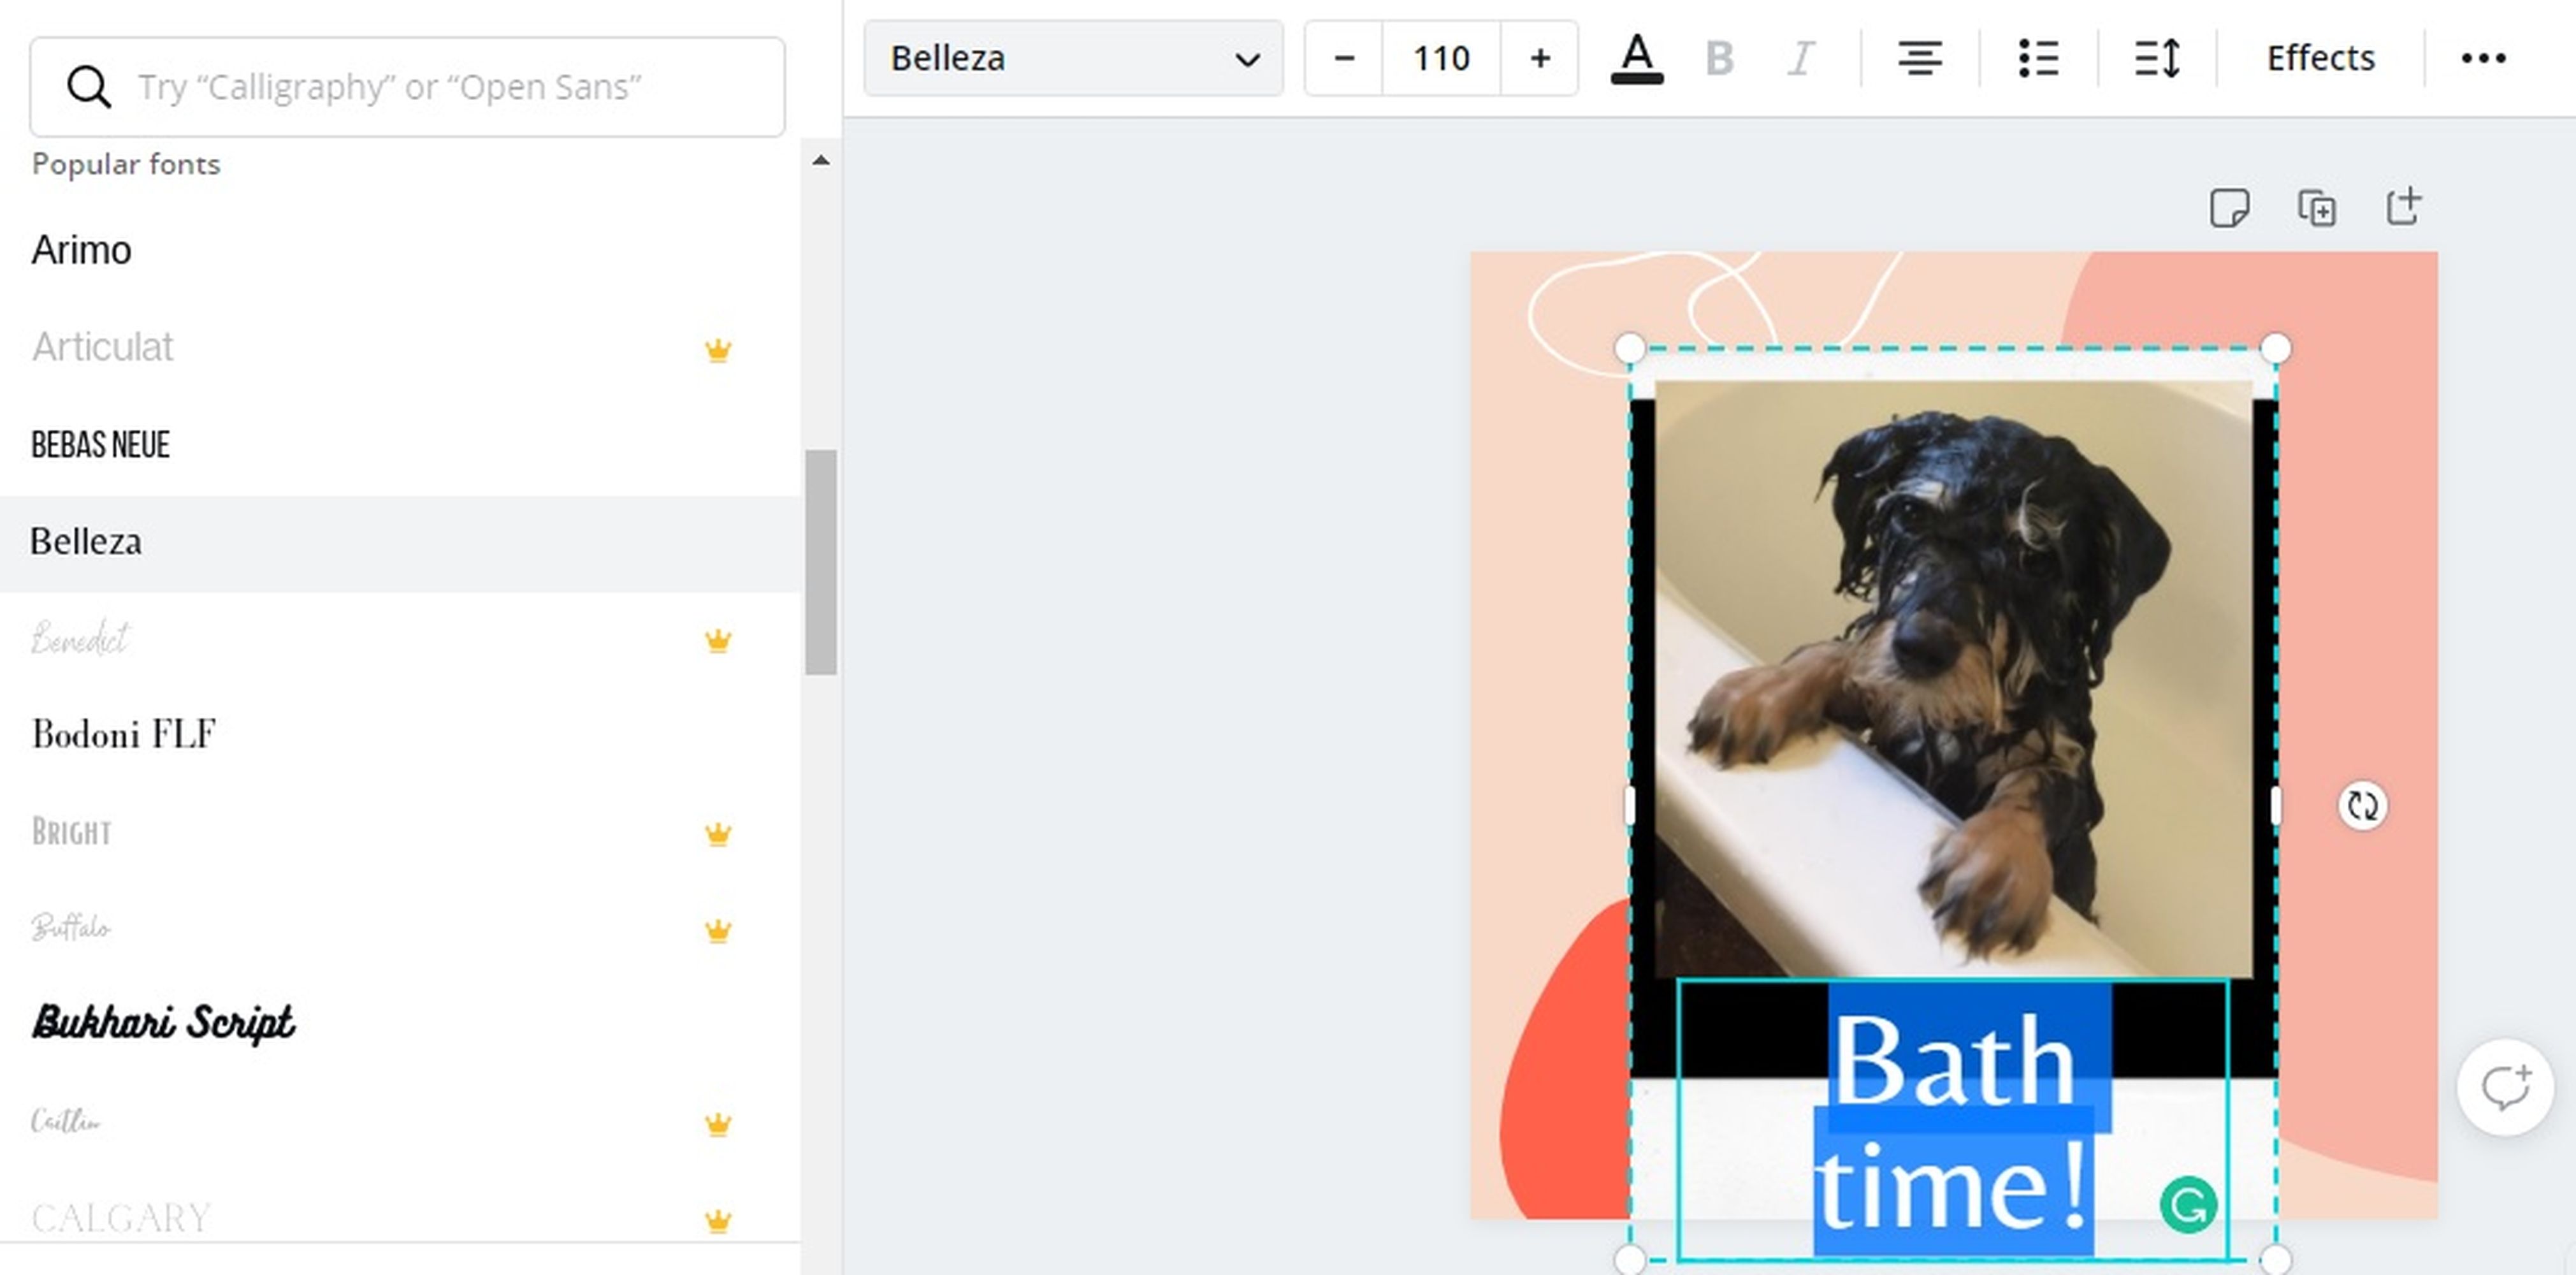
Image: CANVA / AMY-MAE TURNER
These are extensive. They allow you to change the font type, size, and how the text is aligned, and add effects such as drop shadows and glows. If you click the three-dot “More” menu at the top right of your screen, you’ll see even more advanced options to change the transparency of the text and where it is positioned on the design.
One option that’s worth looking at in more detail is the ability to change the color of the text. If you click the underlined capital A menu option to the top middle of your screen, your text color options appear on the left.
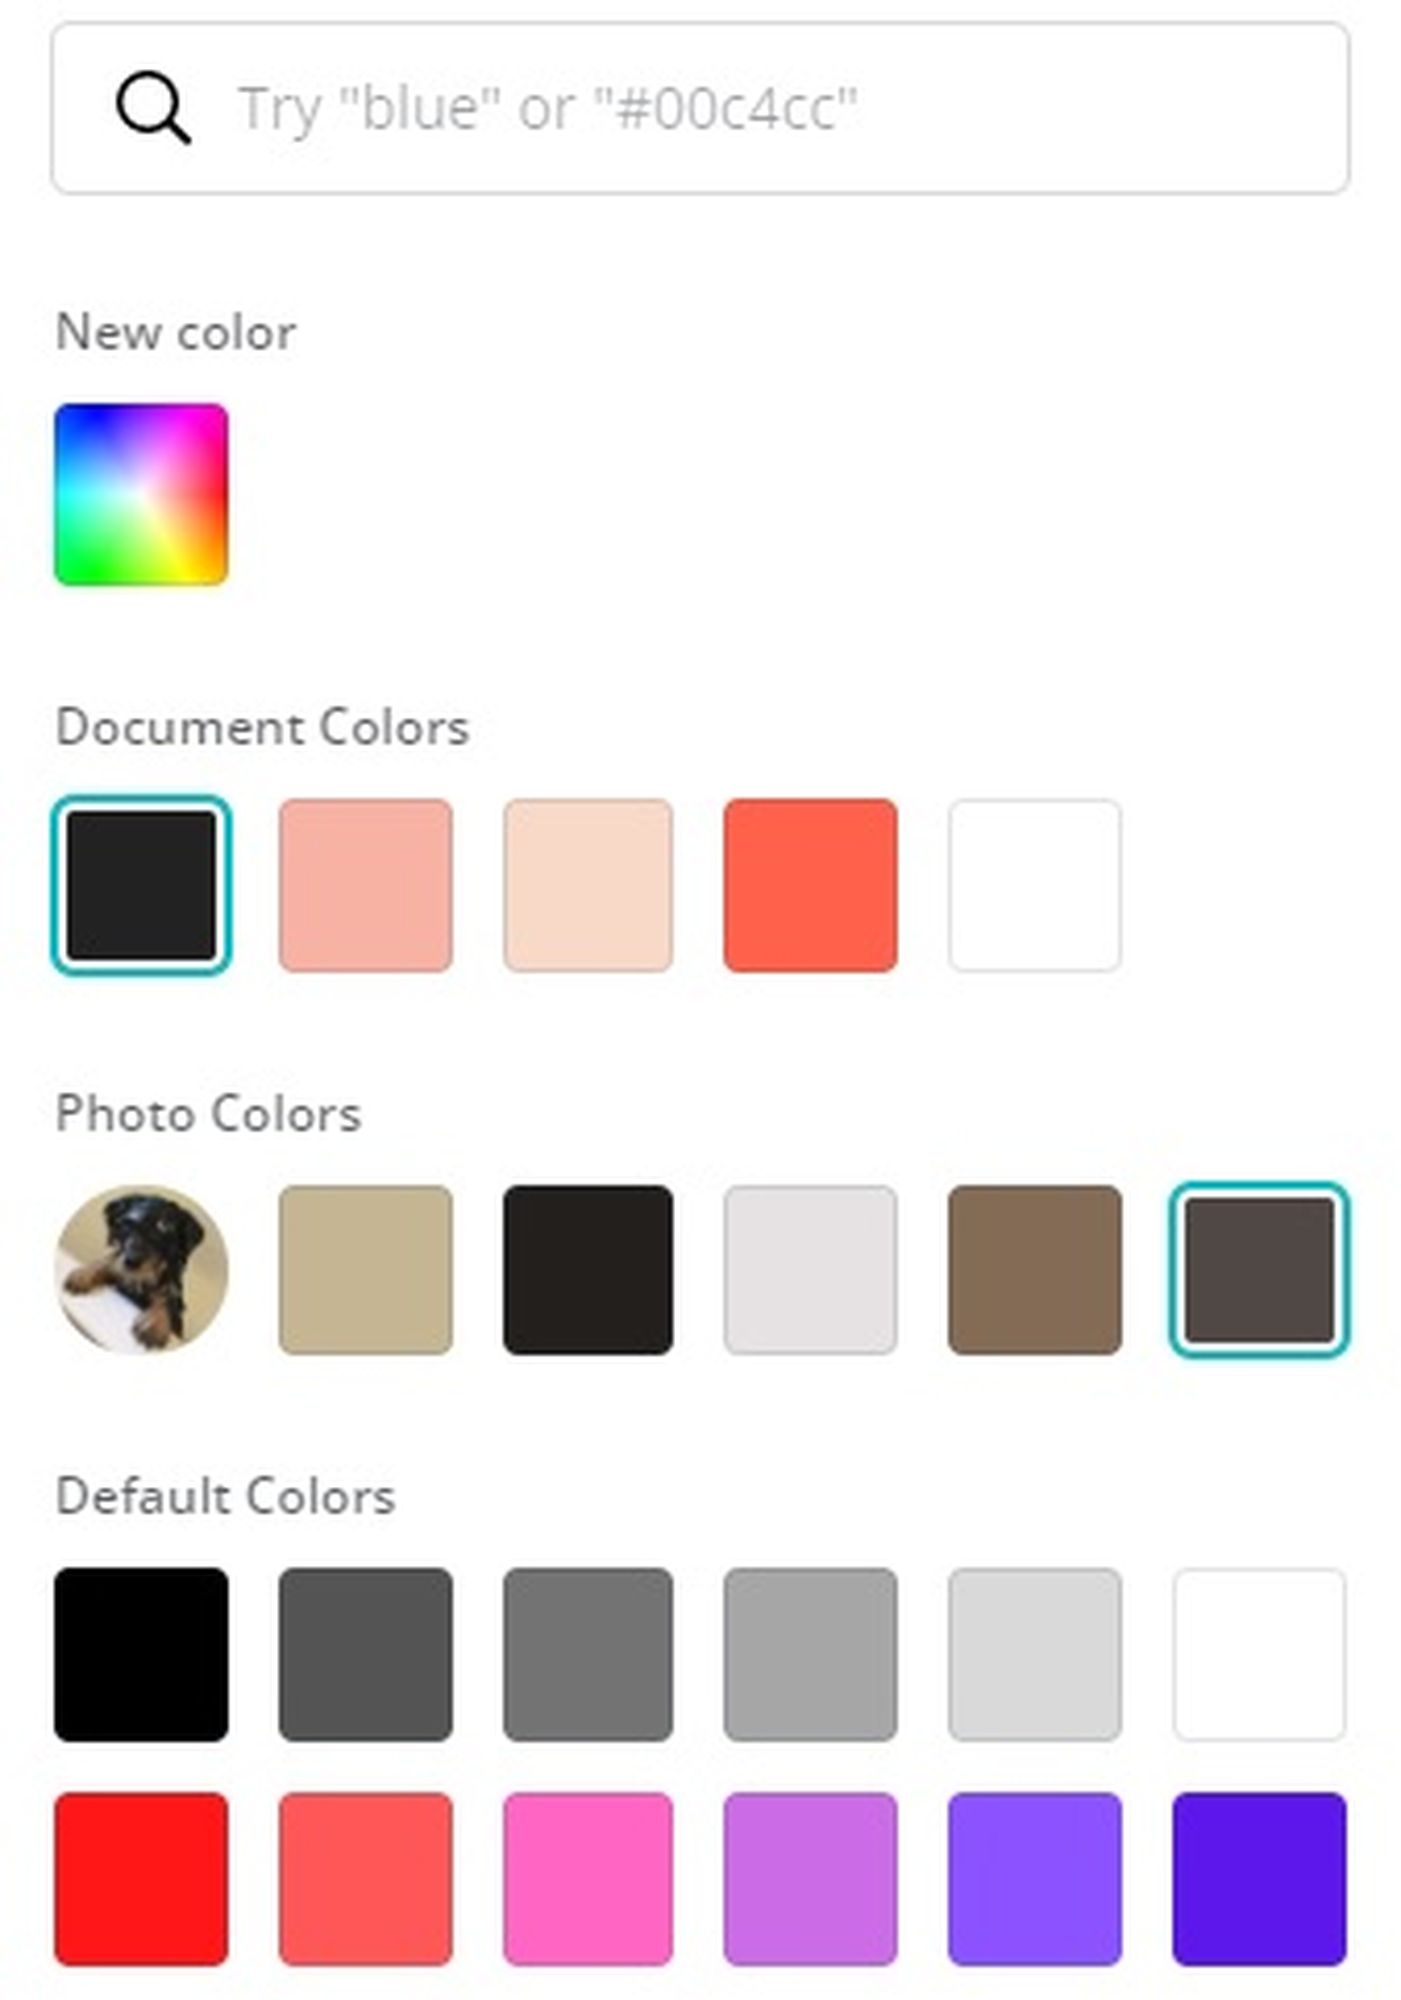
Image: CANVA / AMY-MAE TURNER
From here you can search for a color by keyword, or by RGB HEX color code in the search box at the top. Next down is a color picker button; if you click it, it will allow you to choose any hue from the pop-up color chooser window.
Below the “New color” picker tool, Canva gives you exact matches of colors that are in your design. This includes a selection of colors that already appear in your document, and even more cleverly, colors picked out from any image you’re using, even if it’s one you’ve uploaded yourself.
The next thing we’re going to change are the colors on the page, as this works in a similar way. Click on your screen when there is a design element, such as a shape or patch of color, to highlight this element. You will see a blue box appear around the selected element and a small corresponding square of color at the top of your screen.
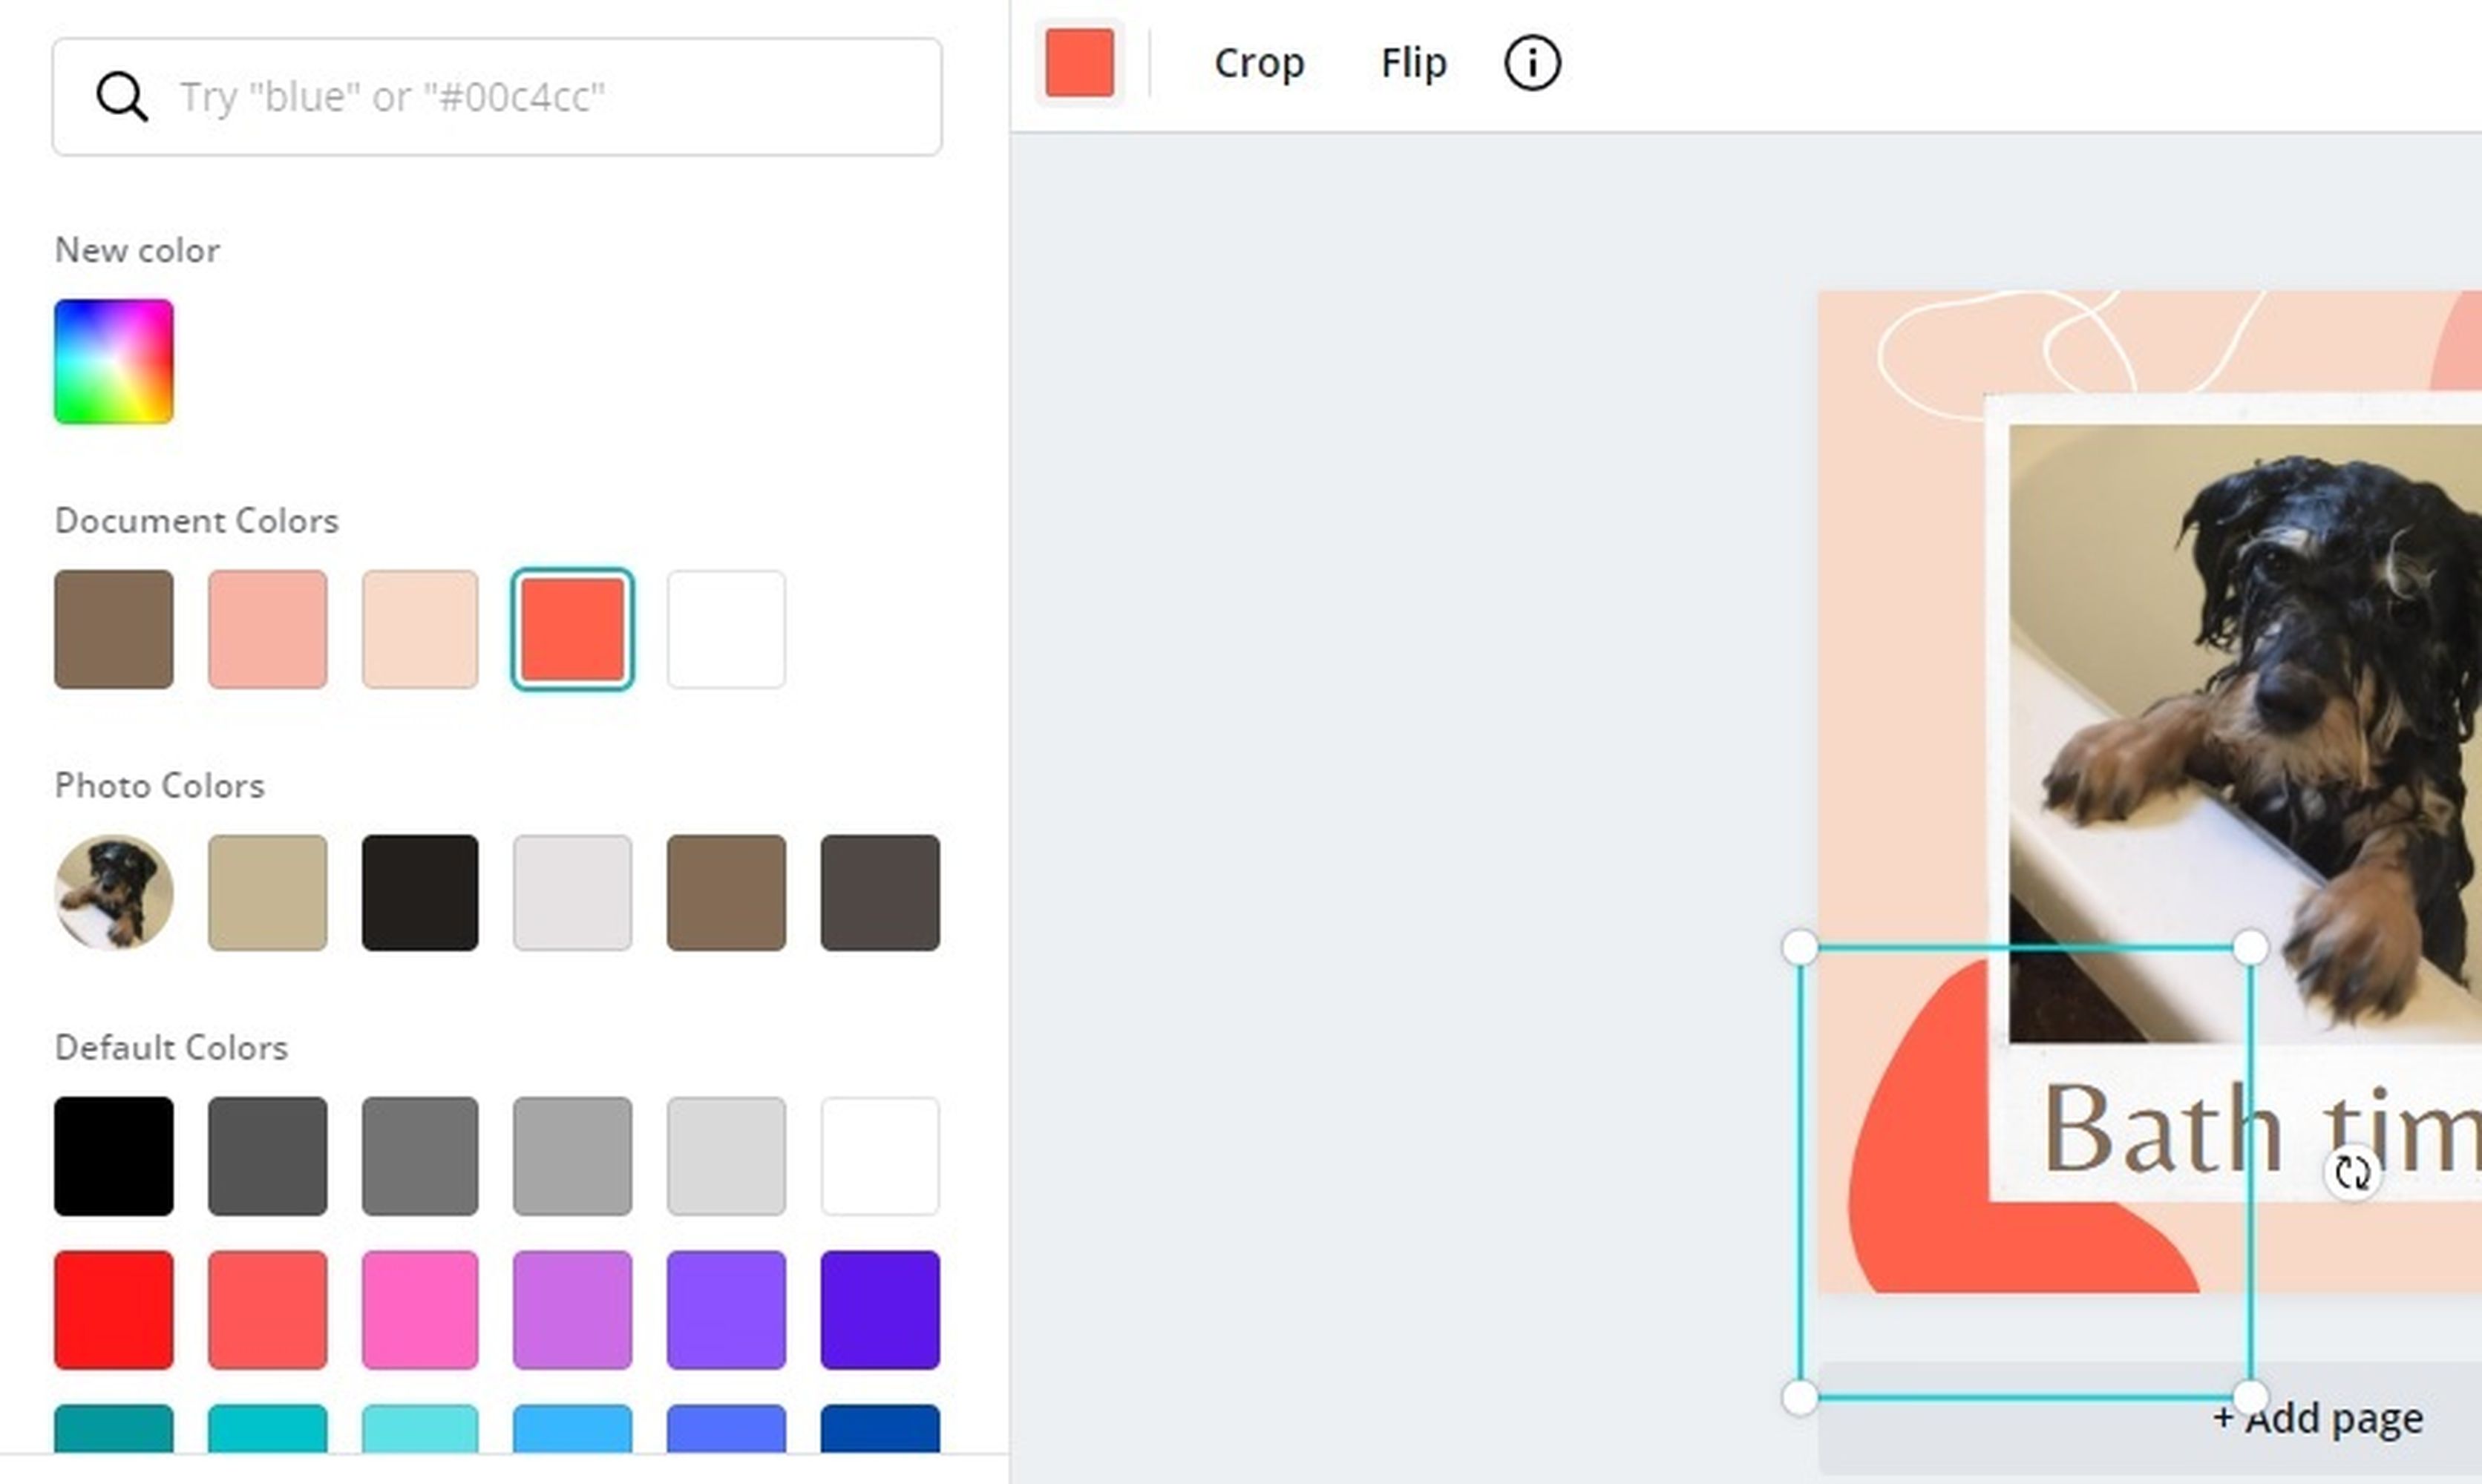
Image: canva / amy-mae turner
If you click on the small square, you’ll see the same color menu appear as for the text color options, allowing you to choose from existing colors in your design, or add in fresh new ones. You can click to change each element separately, including the background color, this way.
Next, should this suit your design, you can add in some free icons and shapes. Start this process by clicking on the “Elements” menu option to the left of your screen.
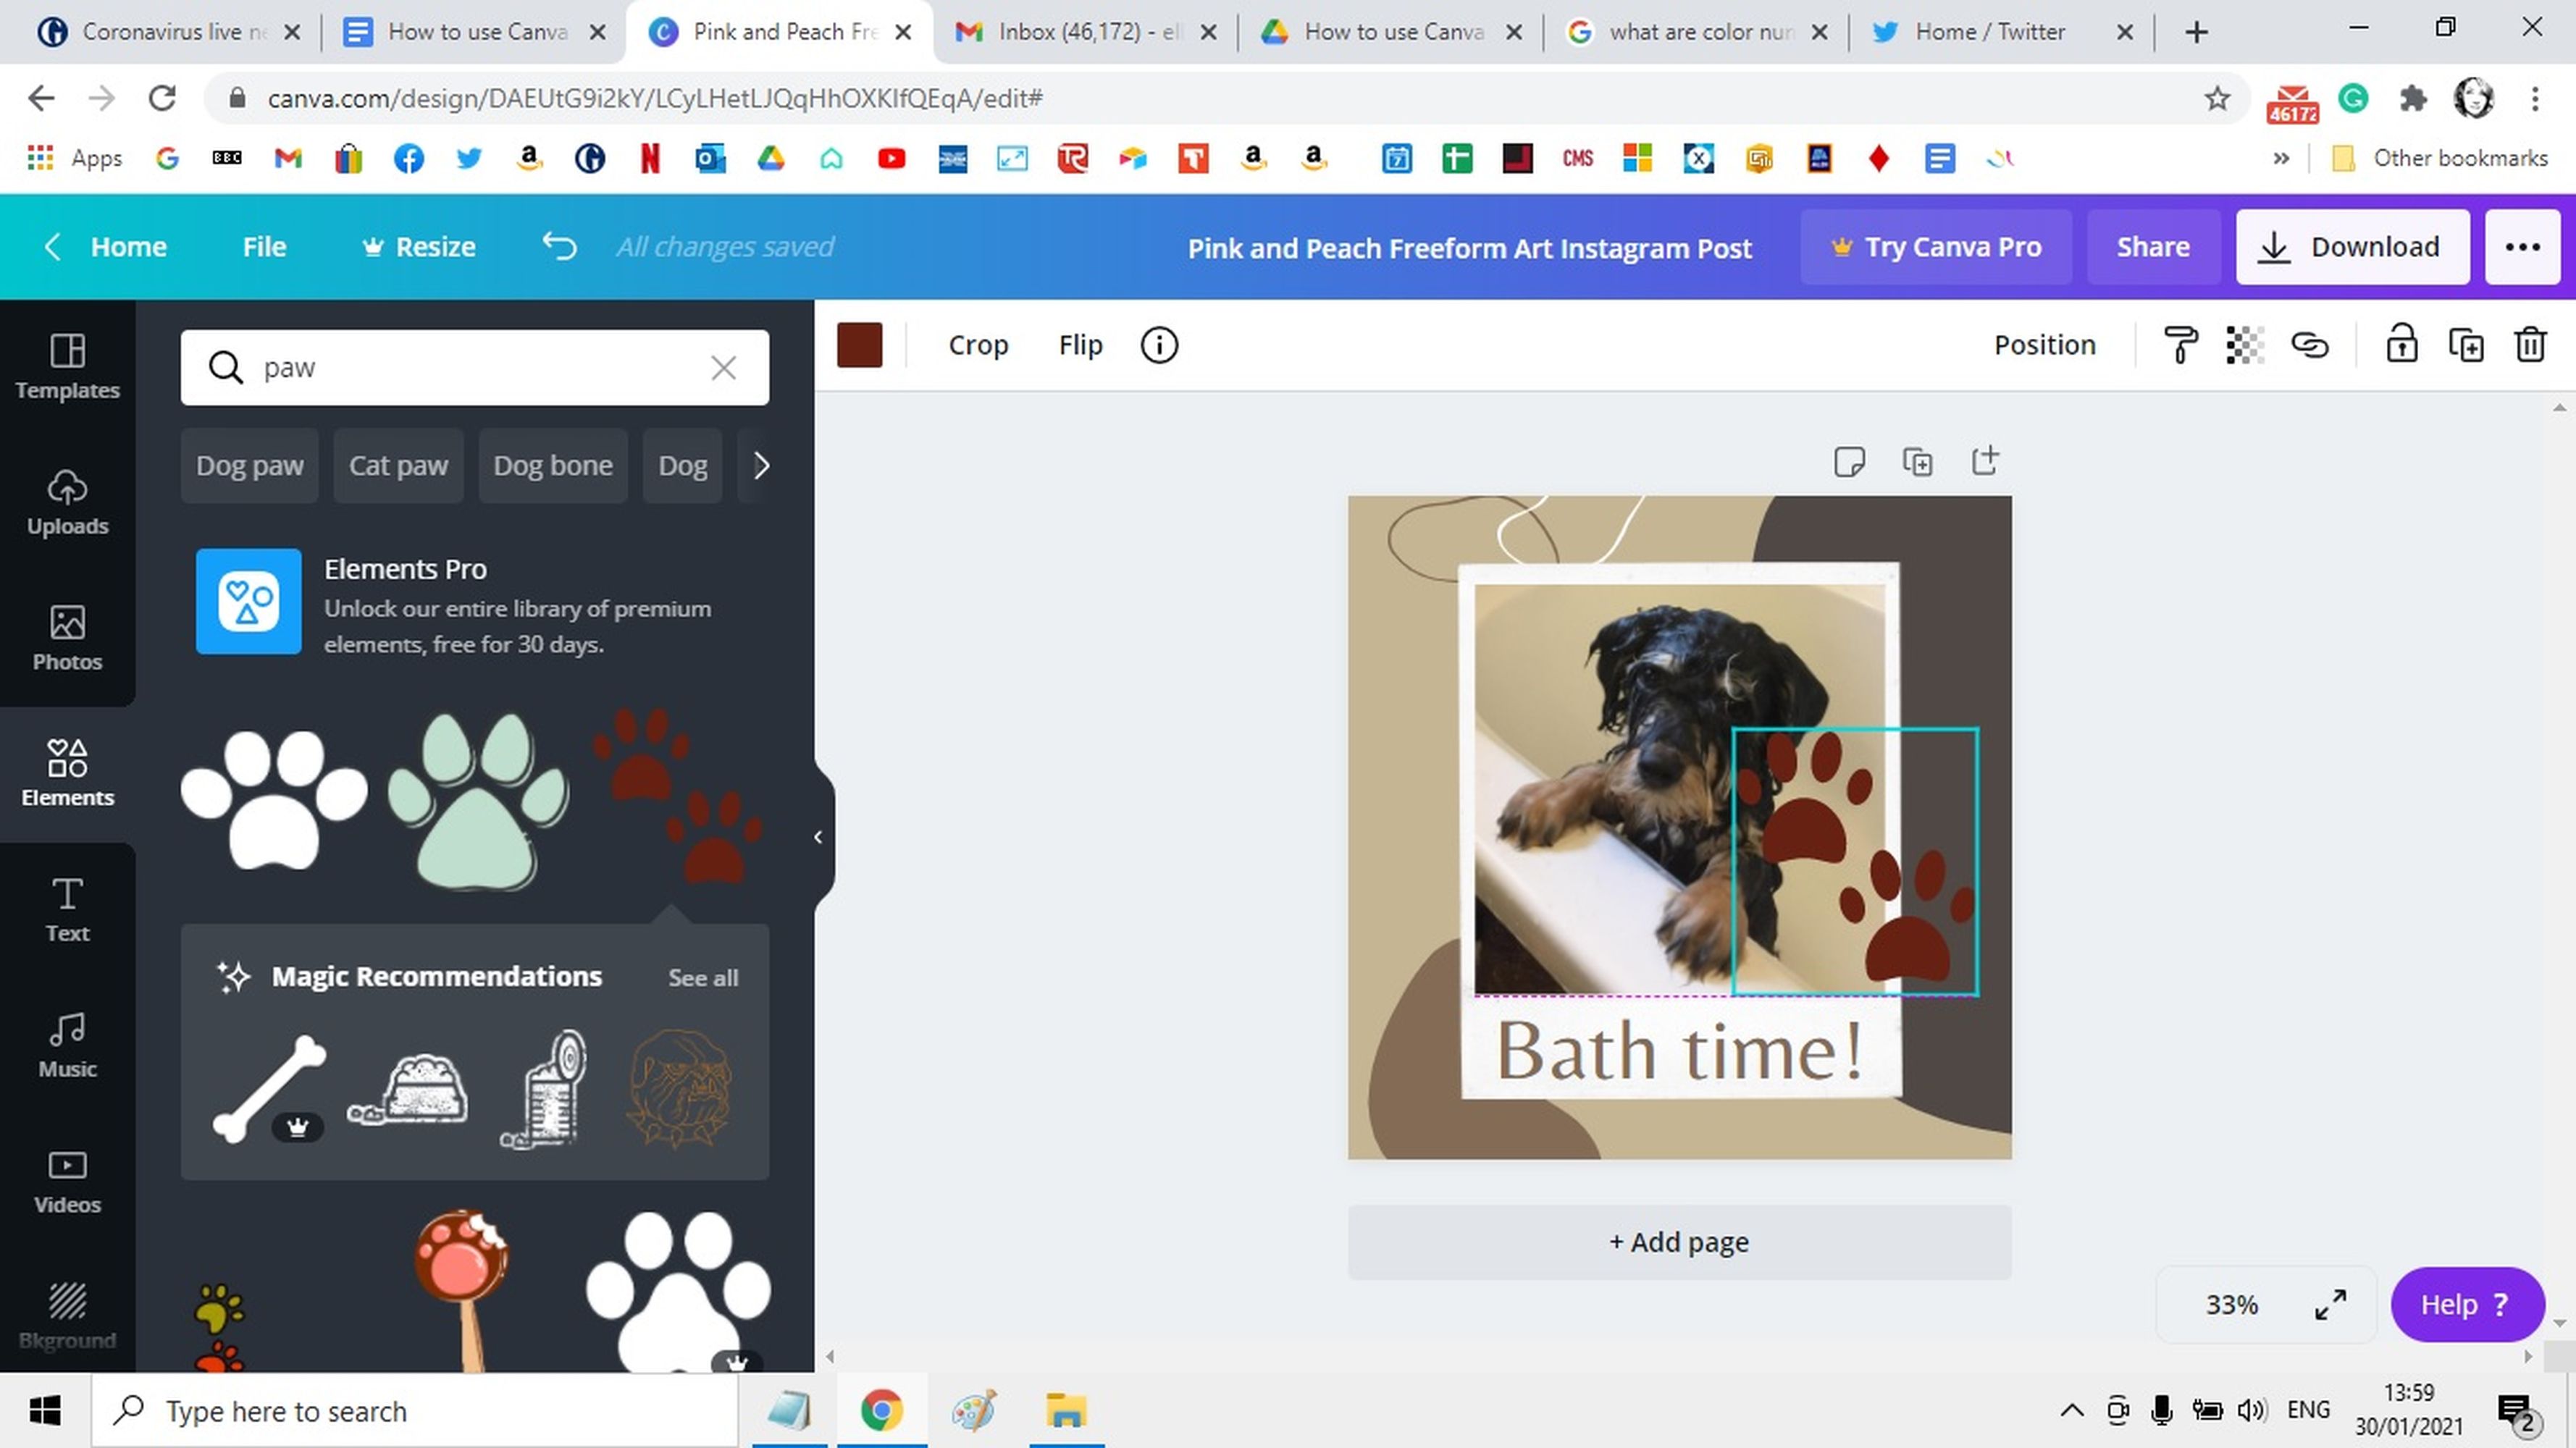
Image: CANVA / AMY-MAE TURNER
From here you can keyword search for what you’re looking for and select the free versions available. Alternatively, you can scroll down through the elements menu to see what’s available. This includes shapes, arrows, lines, frames, stickers, and a whole, huge selection of themed graphics. Once you click on what you’d like to add, these will appear on your design. You can position them where you want them, resize them by grabbing a corner and making them larger or smaller, or in some cases look for that small color square at the top of the screen to change their color.
When you’ve finalized your design, look to the top left of your screen for your sharing and downloading options. Hitting share lets you share the image with your Canva team members, to an email address, or you can generate a link to your creation.
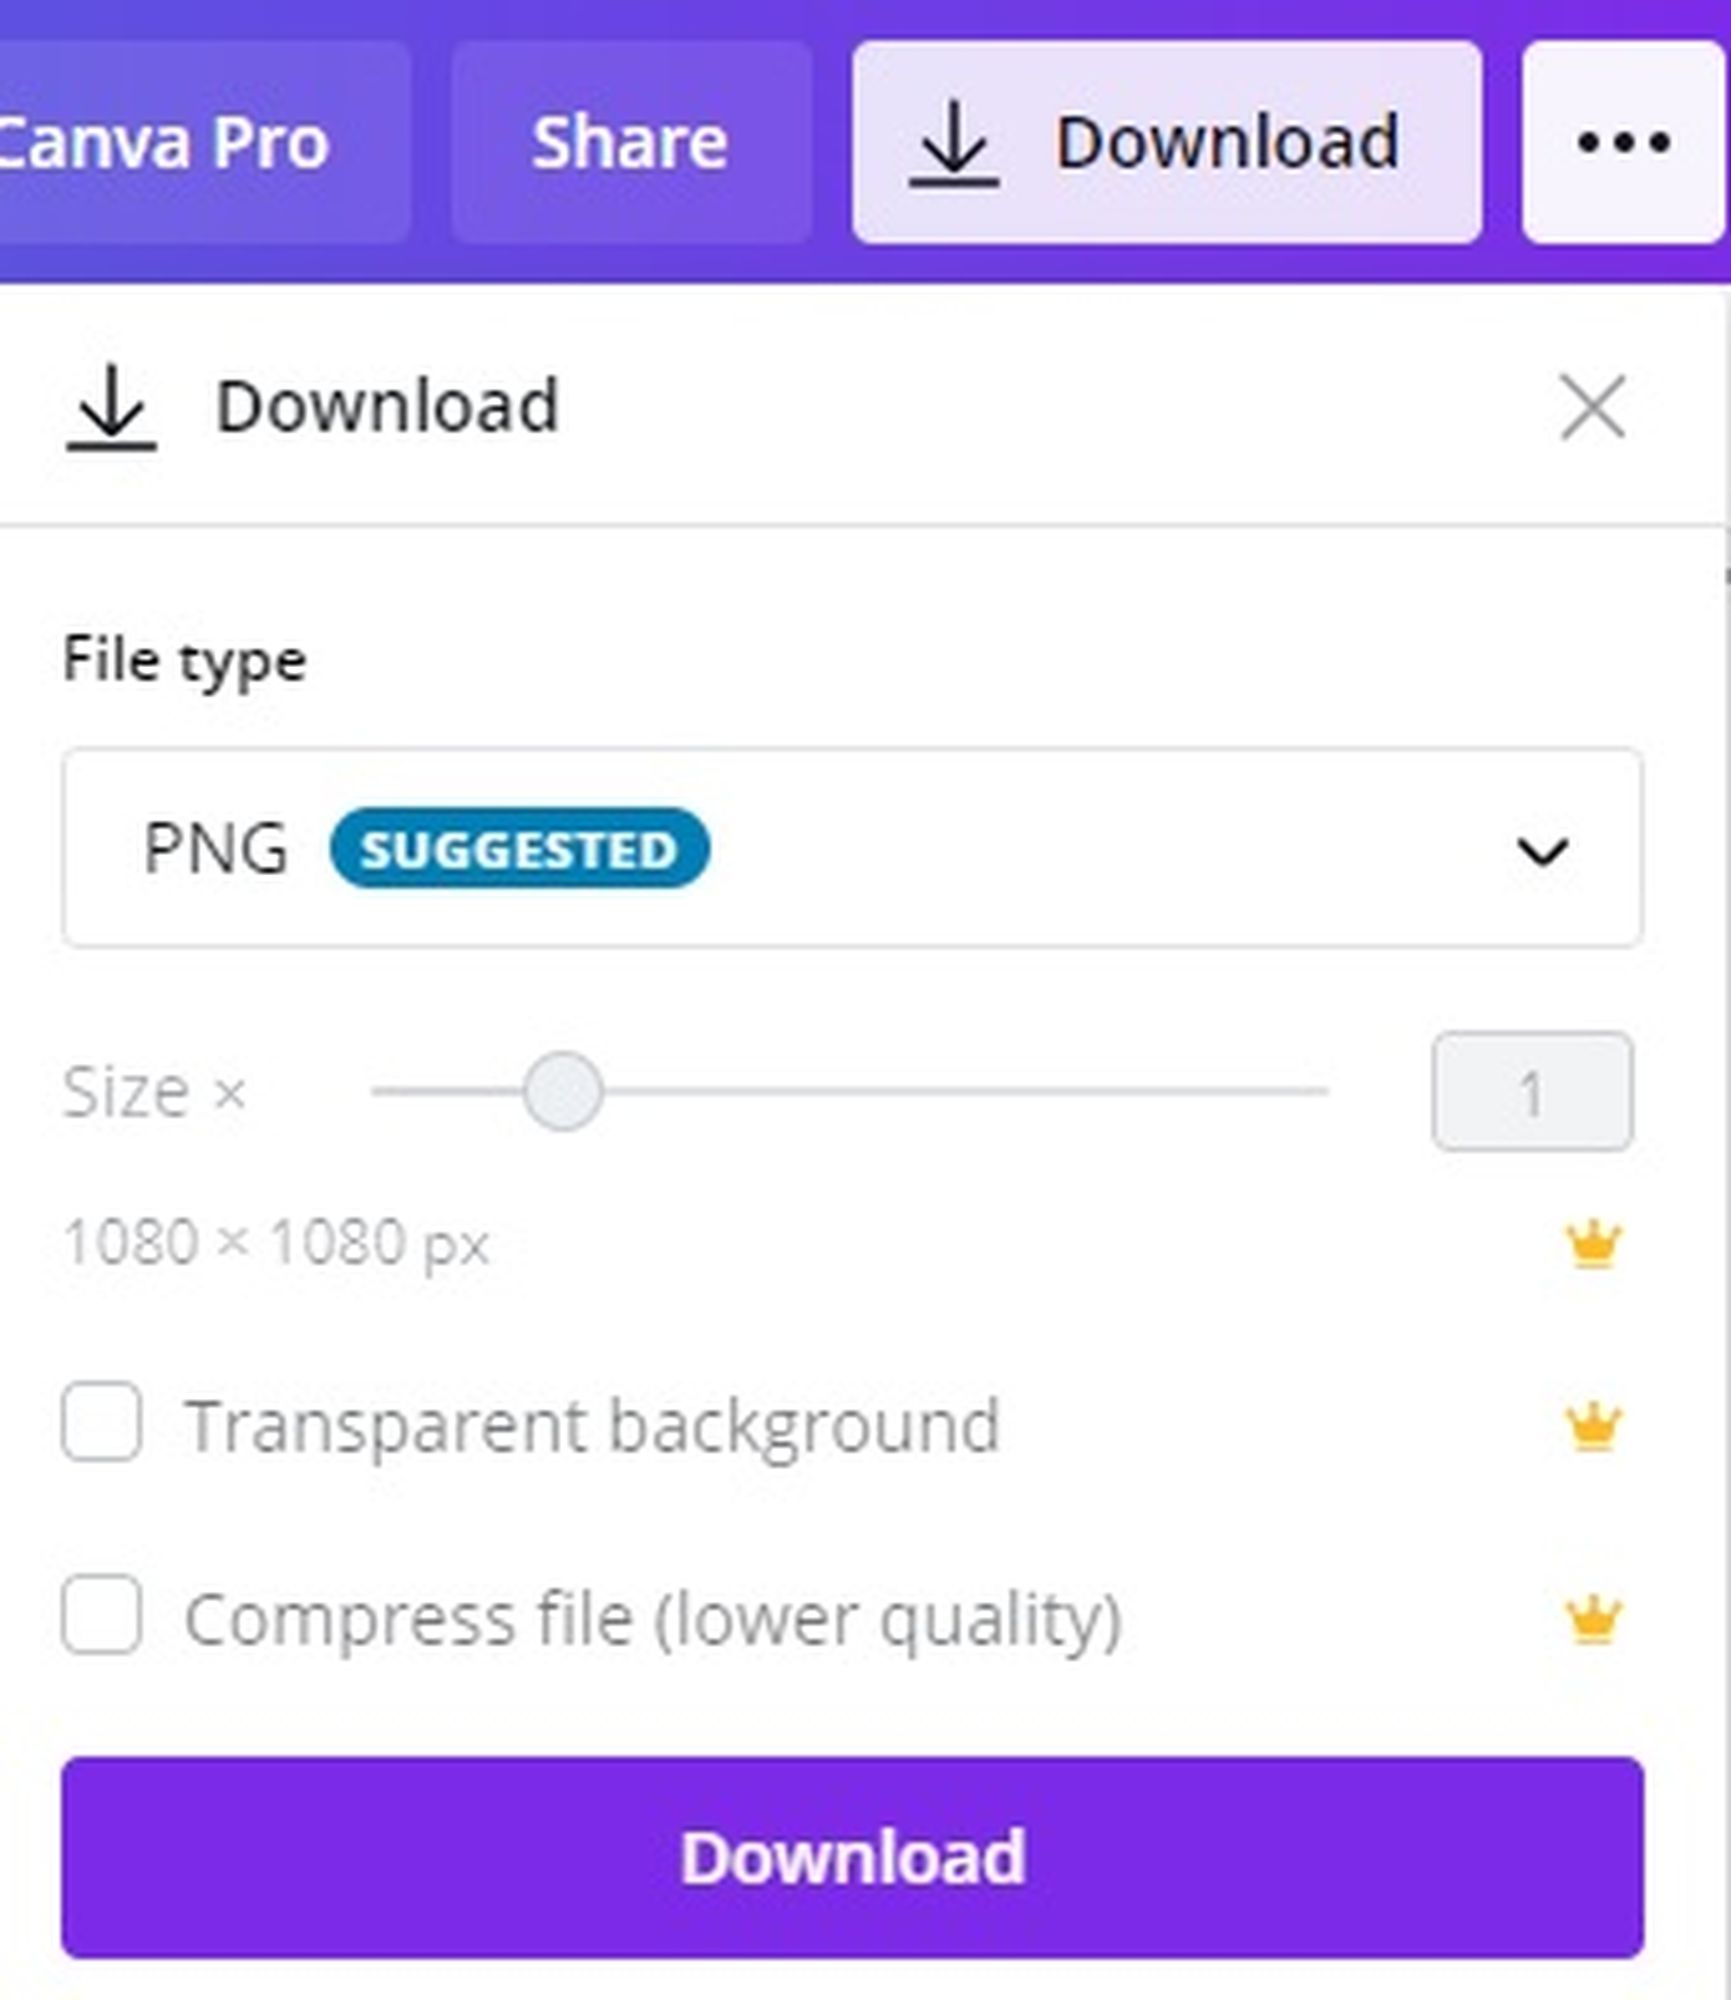
Image: CANVA / AMY-MAE TURNER
As you download, you do have further settings to consider. For free Canva users, this is whether you want to download your creation as a PNG, JPG, PDF, or GIF file. Use the drop-down menu to change from the default PNG option.

Image: CANVA / AMY-MAE TURNER
And that’s it! Creating with Canva is a very simple, step-by-step process. With this free tool available to everyone, there is no excuse for sub-standard social media posts ever again.
How to use Canva for special occasions
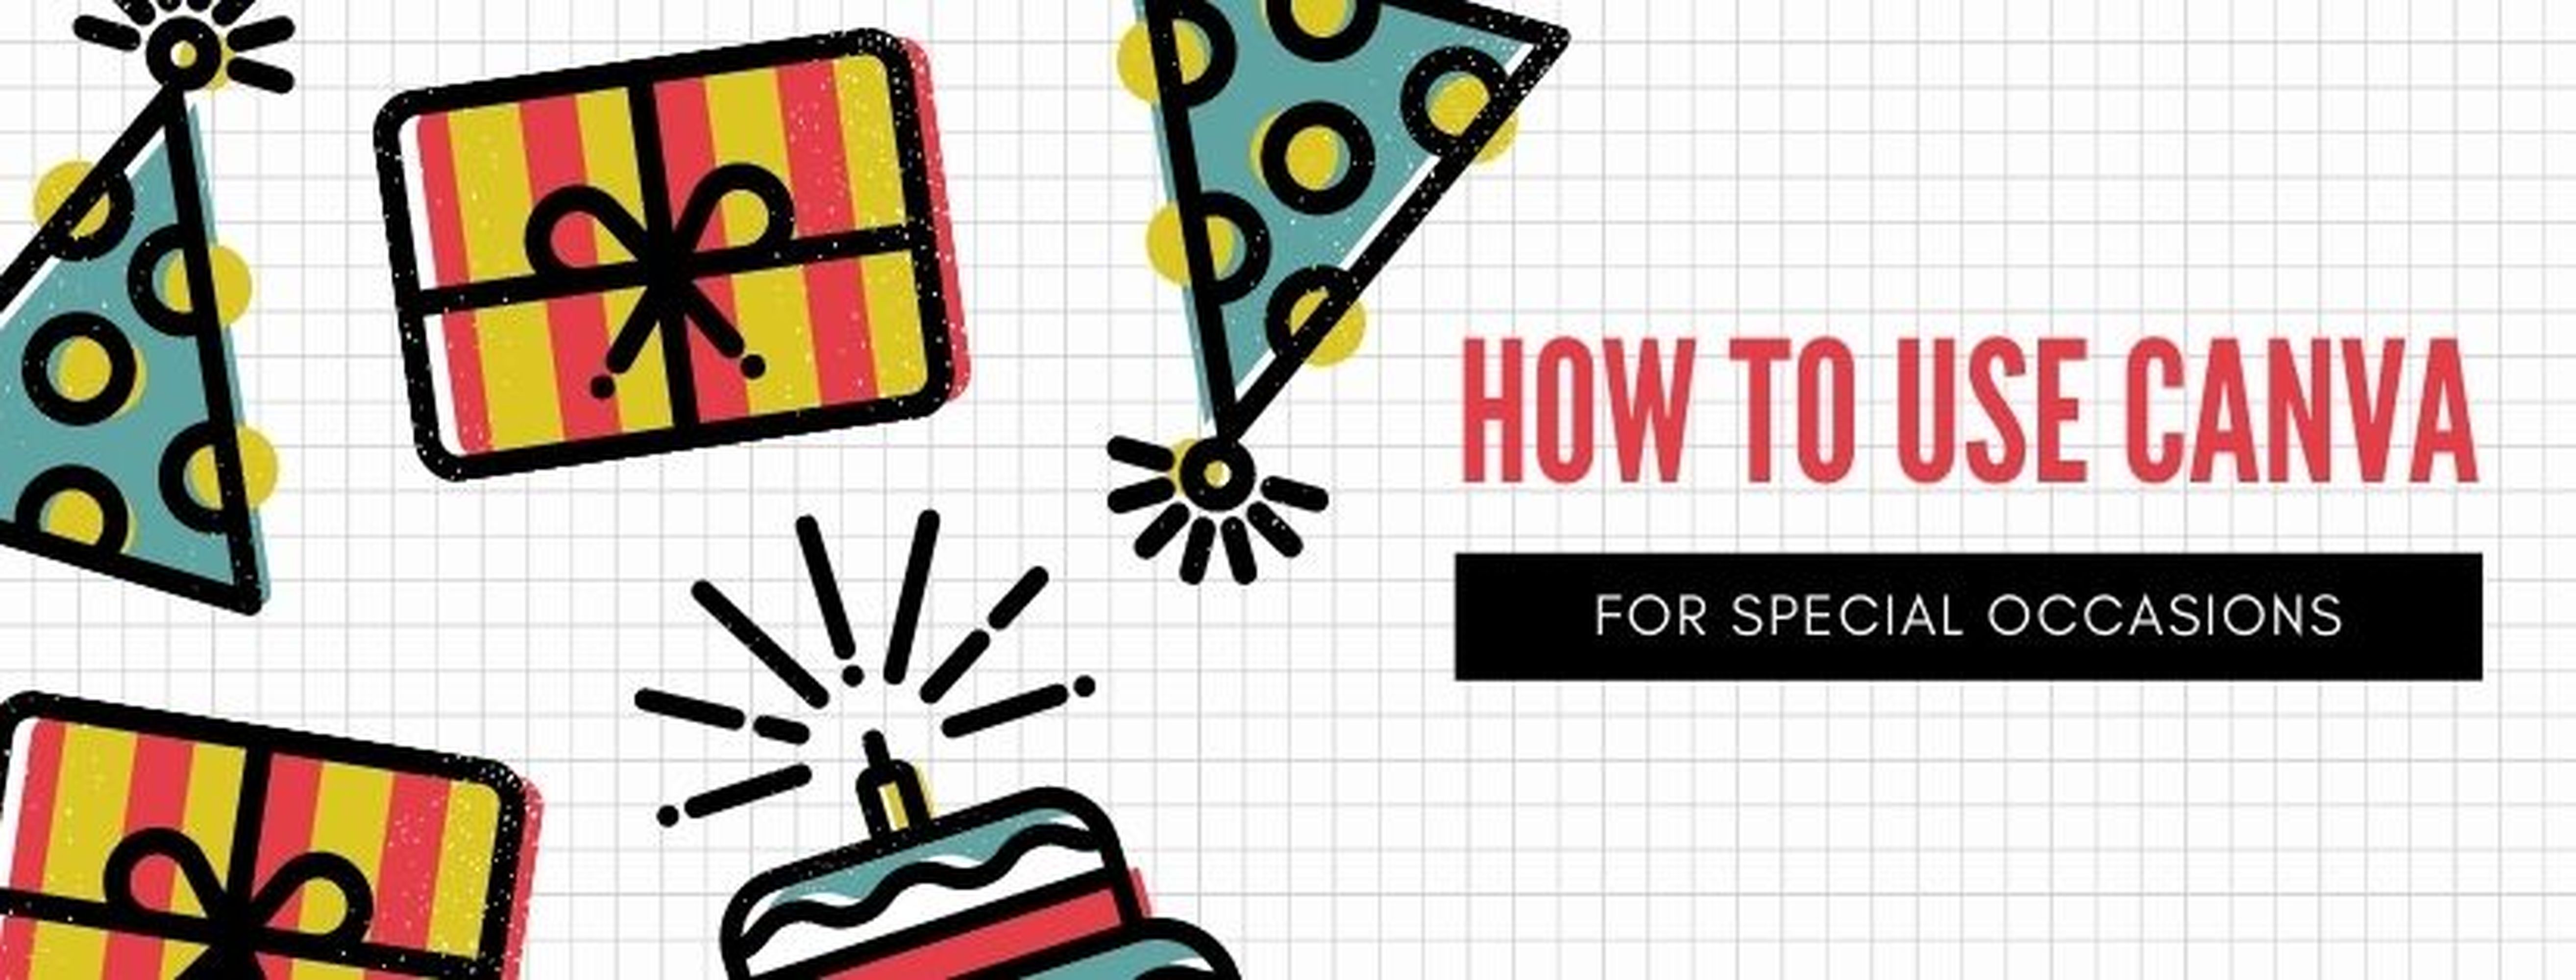
Image: CANVA / AMY-MAE TURNER
Canva goes further than just Facebook posts, though. You can create design content for the special occasions and memorable moments in your life using the free platform too.

Image: CANVA / AMY-MAE TURNER
Canva offers free templates, many of which are genuinely lovely, for all kinds of greeting cards, postcards, save-the-date notices, invitations, announcements, to create fun “tickets” for events, and to make photo books to remember an event or occasion.
How to use Canva for personal graphic design
Image: CANVA / AMY-MAE TURNER
There are plenty of personal graphic design options on the Canva platform, as well. In some cases, you can save money by making your own personalized versions of products you’d normally have to buy.

Image: CANVA / AMY-MAE TURNER
These include labels, such as address, kitchen, and gift labels, creating your own calendars, making weekly schedule planners, designing travel and food diaries, making chore and meal charts, and so much more.
How to use Canva for professional graphic design
Image: CANVA / AMY-MAE TURNER
On a basic level, you can use Canva’s pre-made templates to make a business card, to create your resume, and to write professional-looking letters.

Image: CANVA / AMY-MAE TURNER
Other templates that professionals from all kinds of industries might find useful are presentations, invoices, business letterheads, logos, proposals, flyers, brochures, newsletters, and flyers, among many, many others.
Taking Canva creations to the next level
Image: CANVA / AMY-MAE TURNER
Posters, Zoom virtual backgrounds, menus, CD covers, infographics, basic website design, Twitch banners, Instagram sale post templates, certificates, T-shirt designs, mug designs, A4 documents, animated social media content, jigsaws, and gift certificates are some further examples of the kind of easy, templated graphic design Canva offers.
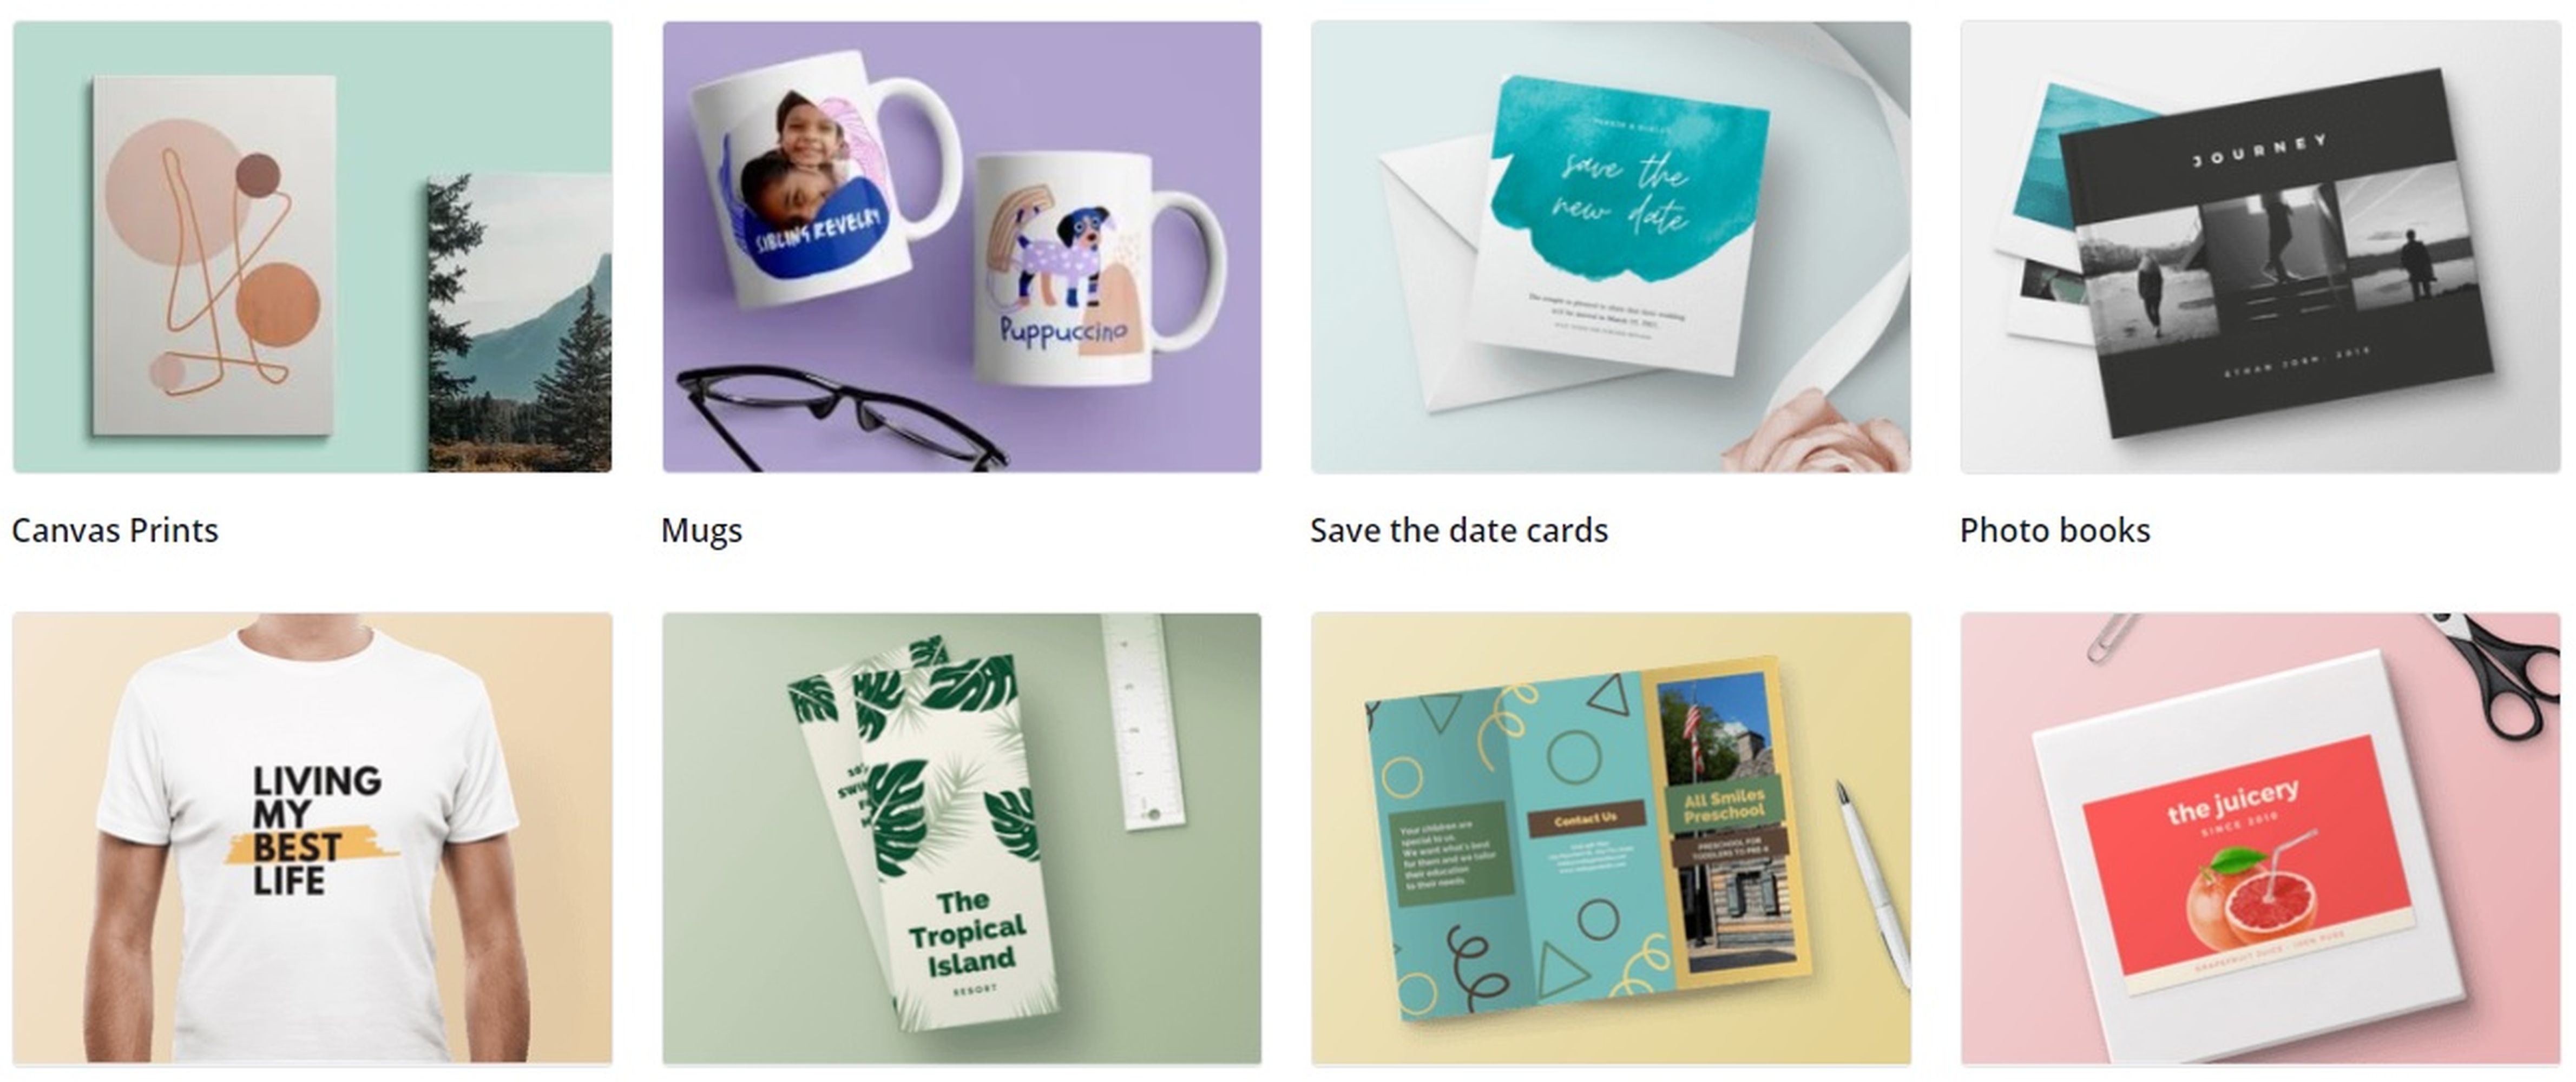
Image: CANVA / AMY-MAE TURNER
You can even pay to have some of these professionally printed via the Canva Print service. If you haven’t already, sign up to this fantastic free service and enjoy getting creative with a bit of DIY design. It’s highly recommended.
